(Hey! Some links in this post may be affiliate links — meaning I may earn a small commission if you buy through them, at no extra cost to you. As an Amazon Associate, I earn from qualifying purchases. I only share products I genuinely love and think you’ll find useful too. Read the full disclosure here).
Get ready to reimagine your appetizer game with a playful twist on a timeless favorite! I’m bursting with excitement to share this clever recipe that adds crunch to creamy perfection. Imagine biting into a golden, crispy shell that gives way to a smooth, savory center—it’s like your taste buds won the party lottery!
This method takes just five minutes of hands-on prep and uses a kitchen gadget you already love. The magic happens when fluffy yolk filling meets a crunchy coating, creating a texture contrast that’ll make you rethink everything you know about classic recipes. Perfect for Halloween gatherings or anytime you want to wow a crowd!
What makes these stand out? That irresistible crunch factor we all crave, achieved without deep frying. You’ll love how simple it is to transform basic ingredients into something extraordinary. I’ve tested every step to ensure your creation turns out beautifully golden and deliciously snackable.
Whether you’re hosting game night or need a showstopping potluck contribution, this dish delivers both flavor and fun. Let’s dive into the secrets behind achieving that perfect crispiness while keeping the filling luxuriously smooth. Your guests won’t believe their eyes—or their taste buds!
Contents
Introduction to This Devilishly Fun Recipe
Picture this: velvety-smooth filling hugged by a golden, crackling shell that shatters with every bite. I’m thrilled to introduce a game-changing appetizer that turns traditional finger food into a texture revelation! Forget what you know about ordinary party snacks—this mashup of creamy and crispy will have everyone reaching for seconds.
Why Try This Unique Twist?
Classic versions often lack excitement after the first few bites. But here’s the secret: breadcrumbs and panko create a satisfying crunch that contrasts beautifully with the rich yolk mixture. You’ll experience:
- A party-perfect balance of soft and crispy textures
- Restaurant-quality presentation in under 10 minutes
- Zero oil splatters compared to deep-frying
“The contrast between the crispy coating and creamy center is what keeps guests coming back for more!”
Smart Cooking Made Simple
Your countertop appliance becomes the star here. At 390°F, it works its magic in 8-10 minutes—no flipping required halfway through! I’ve found this method:
- Locks in flavor while creating that irresistible golden finish
- Keeps the filling perfectly chilled until serving
- Makes cleanup a breeze compared to traditional methods
Whether you’re hosting Halloween festivities or need a quick appetizer upgrade, this technique delivers maximum impact with minimal effort. Ready to hear the best part? You likely have all the ingredients in your pantry right now!
Ingredients and Preparation Essentials
Let’s talk about the building blocks that turn ordinary snacks into crunchy delights! Every great recipe starts with quality components, and this one’s no exception. You’ll need two types of eggs here—some for filling and others for breading—plus a few pantry staples that add serious personality.
Flavor Boosters & Crunch Creators
The magic happens when creamy meets crispy. For the filling, grab Dijon and yellow mustard—their tangy kick balances the richness perfectly. The coating? A golden trio of flour, buttery Ritz crumbs, and panko breadcrumbs that’ll make your taste buds dance!
| Ingredient | Purpose | Pro Tip |
|---|---|---|
| Large eggs | Base for filling & breading | Use store-bought for easier peeling |
| Ritz cracker crumbs | Adds rich, buttery crunch | Grind finely for even coating |
| Garlic powder | Enhances savory notes | Mix with parsley for extra zing |
Egg Prep Like a Pro
Perfect hard-boiled eggs start with precise timing. Whether using your favorite appliance or the stovetop, cook them at 250°F for 17 minutes. Immediately plunge into ice water—this stops overcooking and loosens shells for stress-free peeling!
- 6 eggs for filling + 2 for breading station
- Ice bath = no green yolks!
- Older eggs peel easier than fresh ones
Now that your components are prepped, you’re ready to create that iconic crispy shell around the velvety center. Let’s get coating!
Step-by-Step Recipe Guide
Time to roll up those sleeves! I’ll walk you through creating these crunchy delights with foolproof precision. The secret lies in two key phases: nailing the cooking time and mastering the breading process. Let’s transform those smooth centers into golden masterpieces!
Crispy Perfection in Minutes
Preheat your countertop appliance to 390°F—this temperature creates that ideal golden crunch. Arrange coated halves in a single layer, leaving space for hot air circulation. Set the timer for 9 minutes, flipping halfway through with a silicone-tipped fork to protect the delicate coating.
Triple-Coating Magic
Set up three shallow dishes: flour, beaten mixture (with mustard and mayo), and seasoned crumbs. Here’s my pro method:
- Dust each white in flour—shakes off excess
- Dip in the creamy binder—coats evenly
- Press into crumbs—gentle pats help adhesion
Work in batches of 4-5 pieces to prevent overcrowding the basket. A quick spritz of oil on both sides ensures that glorious caramelization we all love! The entire prep takes just 15 minutes from start to crispy finish.
Pro tip: Keep your yolk mixture chilled until assembly. Pipe it into the warm shells right before serving—the contrast between hot crunch and cool filling is mind-blowing!
Tips for Perfect Deviled Eggs
Let’s unlock the secrets to creating crowd-pleasing appetizers that stay crisp from first bite to last! The magic lies in two crucial elements: a perfectly seasoned center and smart texture preservation. I’ve got game-changing tricks that’ll make your creations the star of any spread!
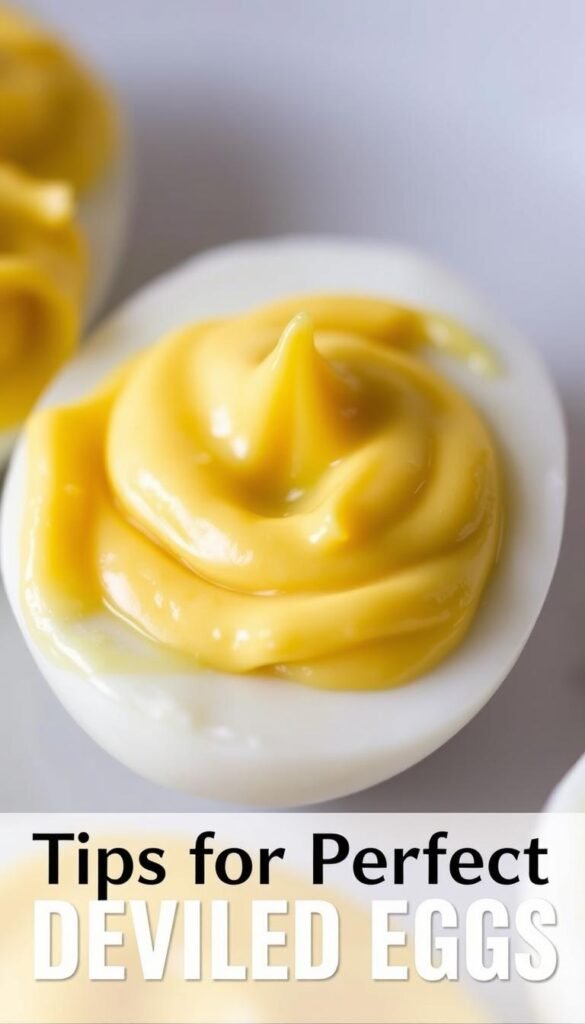
Flavor Harmony in Every Bite
Your yolk mixture should sing with balanced flavors. Start by mashing cooked yolks with mayo and both mustards—the combo creates tangy depth. Add relish for sweetness, then season gradually with salt and pepper. Taste as you go!
| Ingredient | Role | Pro Adjustment |
|---|---|---|
| Dijon mustard | Adds sharpness | Swap for horseradish for heat |
| Sweet relish | Balances acidity | Use chopped pickles for crunch |
| Garlic powder | Enhances savoriness | Try smoked paprika instead |
Crispness That Lasts
Keep that golden shell crunchy with these simple rules:
- Assemble just before serving—store components separately
- Use chilled filling in room-temp egg whites
- Light oil spray helps crumbs caramelize evenly
“Texture contrast makes these irresistible—cool, creamy centers against warm, crispy shells create fireworks!”
For stunning presentation, pipe filling through a star-tipped bag. Feeling adventurous? Mix in sriracha or bacon bits! Remember: these taste best fresh, so time your prep wisely. Now go wow your guests with appetizers that crunch, cream, and delight!
Variations and Serving Suggestions
Let’s explore the endless possibilities for making these treats uniquely yours! Whether you crave spicy kicks or elegant touches, these ideas will transform your appetizer spread into a conversation starter.
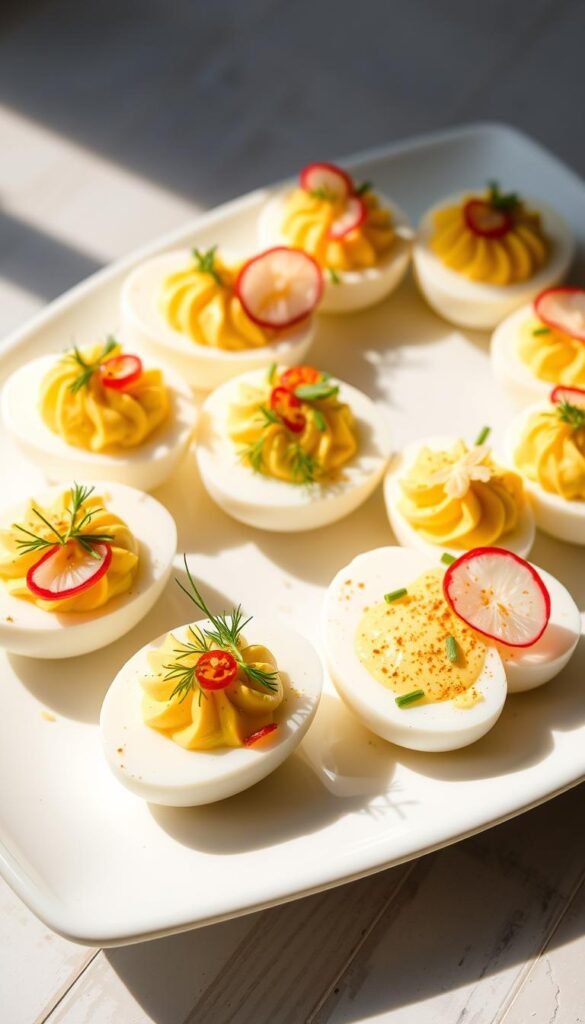
Creative Garnishes and Flavor Customizations
Elevate your recipe with these showstopping additions:
- Crispy bacon crumbles add smoky richness
- Hot honey drizzle creates sweet-heat balance
- Fresh chives or parsley bring garden-fresh color
| Flavor Twist | Ingredient Swap | Perfect For |
|---|---|---|
| Smoky Sensation | Paprika + chipotle mayo | BBQ gatherings |
| Zesty Fiesta | Pickled jalapeños + lime zest | Taco nights |
| Herb Garden | Dill + cucumber relish | Spring brunches |
Feel free to mix in avocado for creamier filling—just add lemon juice to prevent browning. Store custom blends in airtight containers ahead time for stress-free assembly!
Presentation Ideas for Parties and Gatherings
Turn your platter into edible art with these pro tips:
- Use a star-tipped bag for bakery-worthy swirls
- Arrange on slate boards with herb sprigs
- Label variations with cute chalkboard signs
For large events, prep components separately and assemble 30 minutes before serving. The golden rule? Keep that crunch intact by storing coated whites at room temp and chilled filling in your bag until showtime!
Air Fryer Spider Deviled Eggs: Essential Techniques
Mastering these techniques will transform your appetizers from good to unforgettable! Your countertop appliance becomes a crunch-making hero when you follow three golden rules: temperature control, smart spacing, and timely flipping. Let’s turn potential pitfalls into party-ready triumphs!
Crunch Mastery Made Simple
Preheat to 390°F—this sweet spot creates that golden shell we all crave. Work in small batches, leaving space between pieces for proper airflow. A quick spritz of oil before cooking helps crumbs caramelize evenly. Flip halfway using tongs to protect delicate coatings!
Struggling with texture? Here’s my fix-it guide:
- Uneven color? Rotate the basket mid-cook
- Soggy coating? Pat whites dry before breading
- Overcooked edges? Lower temp by 10°F next batch
Keeping That Crispy Magic
Assemble just before serving—store components separately for best results. Leftovers? Place them in an airtight container with parchment between layers. While the coating softens slightly, they’ll still taste delicious chilled!
Remember: Your first batch is a learning experience! Track timing adjustments in your recipe app or notes. Soon, you’ll be creating crispy-creamy masterpieces that disappear faster than ghosts at dawn!



2 Comments