(Hey! Some links in this post may be affiliate links — meaning I may earn a small commission if you buy through them, at no extra cost to you. As an Amazon Associate, I earn from qualifying purchases. I only share products I genuinely love and think you’ll find useful too. Read the full disclosure here).
Welcome to your new favorite way to make delicious homemade treats! I’m excited to share this amazing low sugar banana bread recipe with you. It’s a healthier version that keeps the moist, sweet flavor we all love!
With your air fryer, we’ll make a perfectly tender loaf that’s better for you. It’s great for those watching their intake or just looking for something new. The best part? It’s way faster than baking in the oven!
This healthy banana bread recipe gives you delicious results your family will love. Let’s start this journey to making a better-for-you treat that everyone can enjoy!
Contents
- 1 Why Choose Low Sugar Banana Bread Over Traditional Recipes
- 2 Understanding Air Fryer Baking for Banana Bread
- 3 Essential Ingredients for Your Low Sugar Banana Bread
- 4 Equipment and Tools You’ll Need
- 5 Preparing Your Ingredients
- 6 Step-by-Step Mixing Process
- 7 Air Fryer Setup and Temperature Control
- 8 Baking Your Low Sugar Banana Bread
- 9 Testing for Doneness and Perfect Texture
- 10 Cooling and Storage Tips
- 11 Troubleshooting Common Issues
- 12 Delicious Variations and Add-ins
- 13 Conclusion
Why Choose Low Sugar Banana Bread Over Traditional Recipes
Switching to low sugar banana bread is a great choice for your health and taste. Traditional recipes use a lot of refined sugar, often over a cup. This hides the natural banana flavor we love.
By using less sugar, we can make something delicious with less sweetness. This lets the natural sweetness of ripe bananas shine. It’s a sugar-free banana bread that highlights the fruit.
Your blood sugar will thank you for this change. Unlike traditional recipes, low carb banana bread gives steady energy. You won’t feel that crash after eating.
Low sugar banana bread is versatile. It’s great for breakfast, snacks, or dessert without guilt. It’s perfect for a healthy lifestyle while satisfying sweet cravings.
These healthy baking alternatives don’t mean less flavor. The banana flavor becomes richer and more complex. Once you try it, you’ll never go back to sweet traditional recipes.
| Aspect | Traditional Banana Bread | Low Sugar Version | Health Impact |
|---|---|---|---|
| Sugar Content | 1+ cups refined sugar | Natural fruit sweetness | Stable blood sugar |
| Flavor Profile | Overly sweet, masked banana | Rich, natural banana taste | Better taste satisfaction |
| Energy Response | Sugar spike and crash | Steady energy release | Sustained energy levels |
| Meal Versatility | Dessert only | Breakfast, snack, dessert | Flexible healthy eating |
Choosing low sugar options is good for your health and taste. It shows that healthy doesn’t mean boring. It means making smarter, tastier choices that make you feel good.
When you eat this low carb banana bread, you’ll notice the difference. The banana flavor is brighter, the texture is moist, and you’ll feel full without the heavy feeling of traditional recipes.
Understanding Air Fryer Baking for Banana Bread
Quick banana bread gets a game-changer with air fryer baking! This method changes your baking world. Many home bakers are switching to it for good reasons.
The air fryer uses powerful air circulation to bake your banana bread evenly. It’s a bake that traditional methods can’t match. Every bite is perfectly cooked thanks to the heat.
What’s great about air fryer baking is the lightning-fast results. It’s 25-30 minutes, half the time of a regular oven. You’ll have warm banana bread on your table in no time.
Here are the top air fryer banana bread tips. The compact space means more intense heat. This gives you a golden crust and moist inside. It’s like having a bakery in your kitchen!
Air fryer baking is efficient and convenient. You don’t heat up your whole kitchen. It’s perfect for summer or when you’re in a hurry for banana bread.
Your quick banana bread will have a golden top and soft inside. The heat makes the texture perfect every time. Once you try it, you’ll never go back to traditional baking!
“The air fryer has revolutionized my baking routine – I can make perfect banana bread in half the time with better results than my conventional oven ever delivered.”
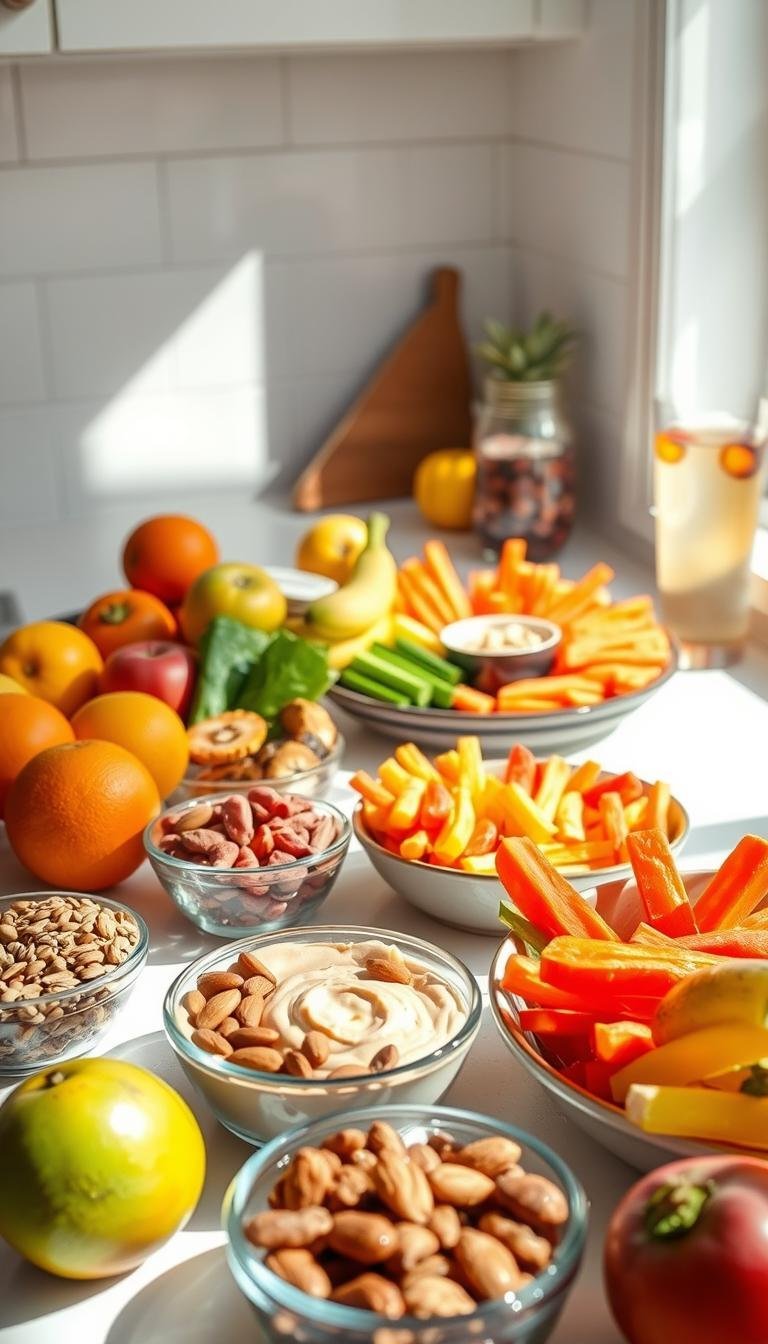
Essential Ingredients for Your Low Sugar Banana Bread
Making amazing low sugar banana bread starts with the right banana bread ingredients. These ingredients are simple and easy to find. You might even have them in your kitchen already.
This recipe is simple. Each ingredient is important for the perfect texture and flavor. Instead of refined sugar, we use natural sweeteners that work great in air fryer baking.
These ingredients work together perfectly. You get a tender, moist banana bread that’s naturally sweet and wholesome.
Natural Sugar Substitutes That Work Best
I’m excited to share the best sugar substitutes for air fryer banana bread. These natural alternatives let the banana flavor shine while keeping your blood sugar stable.
Stevia is my top choice. It’s very sweet, so you only need a little. About 1/4 teaspoon equals 1/4 cup of regular sugar. Start small and adjust to taste.
Monk fruit sweetener is another great option. It measures cup-for-cup like sugar and has no aftertaste. It tastes naturally sweet in baked goods.
Erythritol gives you sweetness without calories. It measures almost like regular sugar and adds great texture to your banana bread.
| Sweetener Type | Sweetness Level | Conversion Ratio | Best For |
|---|---|---|---|
| Stevia | 200x sweeter than sugar | 1/4 tsp = 1/4 cup sugar | Ultra-low calorie baking |
| Monk Fruit | 150-200x sweeter | 1:1 cup replacement | No aftertaste preference |
| Erythritol | 70% as sweet as sugar | 1.3 cups = 1 cup sugar | Familiar sugar texture |
| Pure Maple Syrup | Similar to sugar | 3/4 cup = 1 cup sugar | Natural, less processed option |
Pure maple syrup or honey are great alternatives if you prefer less processed options. Just reduce other liquids slightly when using these. The secret is understanding that these substitutes behave differently than regular sugar, but don’t worry – I’ll guide you through the perfect measurements!
Choosing the Right Bananas for Maximum Sweetness
The secret to incredible low sugar banana bread is using overripe bananas. Look for bananas with brown spots all over the peel. These bananas are perfect for baking.
The browner and softer, the better! When bananas get super ripe, their starches turn into natural sugars. This makes them incredibly sweet without any added sugar needed.
I always keep ripe bananas in my freezer for baking. They thaw perfectly and mash beautifully. If your bananas aren’t ripe enough, pop them in a paper bag for a day or two.
Trust me, patience pays off here! The right bananas will make your low sugar banana bread taste like it’s loaded with sugar when it’s actually just pure, natural sweetness.
Look for bananas that are soft to the touch and have a sweet, intense banana aroma. These sweet bananas are your primary source of natural sweetness and moisture!
Flour and Binding Ingredients
Let’s talk about the foundation ingredients that give your banana bread that perfect, tender texture! All-purpose flour is my go-to choice because it creates that classic, soft crumb we all love.
Here’s the exciting part – you can easily substitute up to half with whole wheat flour for extra nutrition without sacrificing taste! This creates amazing depth of flavor while boosting the nutritional value.
For binding agents, eggs are absolutely essential. They hold everything together and add richness. I love using one large egg plus an extra egg white for the perfect texture.
A touch of baking soda helps create that lovely rise, while a pinch of salt enhances all the flavors beautifully. If you want extra moisture (and who doesn’t?), a tablespoon of Greek yogurt or applesauce works wonders!
These ingredients work together like a dream team, creating a banana bread that’s perfectly structured yet incredibly tender. The key is not overmixing – we want tender, not tough!
Equipment and Tools You’ll Need
Having the right baking tools makes air fryer banana bread a joy. You don’t need expensive gear for amazing results. Your air fryer equipment setup is simple.
Here are the kitchen essentials you’ll need for a smooth baking experience. Make sure you have these items ready:
- Large mixing bowl for combining ingredients
- Measuring cups and spoons for accuracy
- Whisk or wooden spoon for mixing
- Potato masher or fork for mashing bananas
- Rubber spatula for gentle folding
Having the right baking tools makes the process enjoyable. It’s amazing how simple this setup makes everything.
Air Fryer Requirements and Settings
Your air fryer is about to become your new best friend for banana bread! Most standard air fryers with a 3.5-quart capacity or larger work perfectly for this recipe. The air fryer size matters because you need enough space for proper air circulation around your pan.
Understanding your specific model is key to success. Some air fryers run hotter than others, so don’t worry if you need to make slight adjustments! I recommend starting with an air fryer temperature of 320°F – this is the sweet spot for even baking without burning the top.
Your air fryer should have a basket deep enough to accommodate a small loaf pan with clearance for air circulation. If you have a newer model with multiple racks, use the middle position for the most even results. Some air fryers have a “bake” setting in their air fryer settings, which works wonderfully, but the regular air fry setting at the right temperature is just as effective!
Baking Pan Selection for Air Fryers
Choosing the right pan is key to your banana bread success! I absolutely love using a small metal loaf pan (about 7×3 inches) – it fits perfectly in most air fryers and conducts heat beautifully for even baking. Metal pans give you that gorgeous golden crust we’re after!
Silicone baking molds work wonderfully too and are so easy to remove the bread from – no sticking! If you don’t have a small loaf pan, don’t worry. You can use a round cake pan or even divide the batter into muffin cups for individual portions.
Remember that different pan sizes will affect baking time, so keep an eye on your bread! The key is making sure your air fryer baking pan fits comfortably in your air fryer basket with at least an inch of space around it for proper air circulation. I always lightly grease my pan or line it with parchment paper for easy removal – there’s nothing worse than beautiful banana bread that sticks to the pan!
Preparing Your Ingredients
The secret to perfect low sugar banana bread starts long before you turn on your air fryer. It begins with thoughtful ingredient preparation! This step is key to success. When you prep well, mixing becomes easier, and your results are always great.
Proper baking preparation is like having a roadmap to success. You’ll feel confident and organized throughout the entire process. I love this part because it’s so relaxing and therapeutic!
Getting everything measured, mashed, and ready creates a seamless baking experience. Your banana bread prep time is actually an investment in the final quality of your loaf.
“The difference between good and great banana bread lies in the preparation – take your time with each ingredient and you’ll taste the difference in every bite.”
Mashing Bananas to the Perfect Consistency
Creating perfectly mashed bananas is one of my favorite parts of the whole process! You want that ideal balance between smooth and chunky. Use a potato masher or large fork to achieve the perfect banana texture.
Don’t aim for baby food smoothness. Those little banana pieces add wonderful bursts of natural sweetness throughout your bread! If your bananas are perfectly ripe, they’ll mash easily with gentle pressure.
For banana preparation, you’ll need about 1 cup of mashed fruit from 2-3 large overripe bananas. The natural juices are liquid gold – never drain them off! They add incredible moisture to your finished loaf.
Frozen bananas work beautifully too. Just let them thaw completely first. They’ll be extra soft and mash like a dream!
Measuring Sugar Substitutes Accurately
Getting your measuring sweeteners right is absolutely key for perfect taste! Each sugar substitute has different potency levels, so precision matters more than ever.
Understanding sugar substitute ratios prevents disappointment later. Stevia is super concentrated – typically 1/4 teaspoon equals 1/4 cup of regular sugar! Monk fruit sweetener usually measures cup-for-cup like traditional sugar.
Erythritol also measures similar to sugar but tastes slightly less sweet. You might want to add just a tiny bit extra. I always recommend starting with less than you think you need.
Accurate measurements are your best friend here. When using liquid sweeteners like maple syrup, remember to reduce other liquids in your recipe slightly. Trust your taste buds – they know what makes you happy!
Room Temperature Ingredients
Having room temperature ingredients is the secret to incredibly smooth, well-mixed batter! This simple step makes such a dramatic difference in your final results.
When eggs are at the right ingredient temperature, they blend seamlessly instead of creating lumps. Forgot to take them out early? Just place them in warm water for 5-10 minutes – problem solved!
The same principle applies to dairy ingredients like milk or yogurt. Room temperature ingredients create better emulsion and more even baking. Cold ingredients can cause curdling or lumpy batter.
I like to set out eggs and dairy about 30 minutes before I start my baking tips routine. Your mashed bananas should also be at room temperature if they’ve been refrigerated.
This simple preparation step elevates your banana bread from good to absolutely amazing! The difference is truly remarkable.
Step-by-Step Mixing Process
Now, let’s make your ingredients into perfect batter! This batter preparation stage is where your low sugar banana bread comes to life. The secret to a great mixing banana bread batter is gentle mixing and patience.
I love this part of the baking technique because it’s magical. Just mix everything until it’s just combined – never too much! This way, your bread will be soft and fluffy, not tough.
Combining Wet Ingredients
Begin by placing your mashed bananas in a big bowl. They’re the main ingredient of your homemade banana bread! Add your eggs one at a time, whisking gently after each.
This method helps avoid curdling. Then, add your sweetener and whisk until it’s smooth and frothy.
Next, add oil or melted butter and vanilla extract. The smell is amazing! Adding milk or yogurt here adds moisture. Just whisk enough to mix without too much air.
Your mix should be creamy and smell like banana heaven! This base gives your bread moisture and flavor.
Incorporating Dry Ingredients
Now, add dry ingredients and watch your batter transform into real banana bread! Whisk your dry ingredients together first. This includes flour, baking soda, salt, and spices like cinnamon.
This step ensures even mixing and avoids baking soda or salt pockets. Add your dry mix to the wet ingredients and fold gently with a spatula.
Don’t use an electric mixer! We want to mix gently. Fold from the bottom up, turning the bowl as you go, until you can’t see flour streaks.
This should take about 15-20 gentle folds. The batter might look lumpy, but that’s okay! Those lumps will disappear in the oven, and gentle mixing makes your bread tender.
Achieving the Right Batter Consistency
The perfect batter consistency is recognizable. It should be thick but pourable, like thick cake batter. It should fall off your spoon in a ribbon, not in chunks.
If it’s too thick, add a bit of milk and fold gently. If it’s too thin, add a bit of flour and fold until just combined. This banana bread technique is quite forgiving!
You’ll see mashed banana lumps, which add flavor and moisture. The batter should smell great and have a slight golden color from the bananas and eggs.
Don’t worry if it’s not smooth – rustic is beautiful in banana bread! The batter should spread easily but hold its shape. This balance is key for the banana bread texture.
Remember, a few small lumps are perfectly normal and will make your bread deliciously moist!
Air Fryer Setup and Temperature Control
Getting your air fryer temperature and positioning right is key to making amazing banana bread at home! It’s all about the setup for that perfect golden crust and fluffy inside. The temperature control turns your kitchen into a precise baking spot.
Your air fryer uses intense, circulating heat unlike a traditional oven. So, we need to adjust our methods for the best results! Mastering these setup tips will give you perfect banana bread every time.
Preheating Your Air Fryer
Air fryer preheating is a step many skip, but it’s vital for great banana bread! Just like an oven, your air fryer needs to warm up before adding your bread.
I preheat mine for 3-5 minutes at 320°F. This ensures even baking from the start. The preheating time lets your air fryer stabilize its temperature and fan.
While preheating, you’ll hear the fan and feel hot air. This means it’s working well! Some air fryers have preheat lights, but if yours doesn’t, just use a timer. This time is perfect for stirring your batter and preparing your pan.
Optimal Temperature Settings
Finding the optimal temperature for air fryer banana bread has been a fun journey. After many tests, I found 320 degrees is the best for perfect banana bread.
This air fryer baking temperature is hot enough for a golden crust and rise, but gentle for the inside. If your bread browns too fast, try lowering the temperature to 300°F.
The hot air at this temperature gives amazing texture – crispy outside, moist inside. Trust your air fryer for great results!
| Air Fryer Type | Recommended Temperature | Adjustment Notes | Baking Time |
|---|---|---|---|
| Standard Basket | 320°F | Perfect starting point | 25-30 minutes |
| Runs Hot | 300°F | Reduce by 20 degrees | 30-35 minutes |
| Runs Cool | 330°F | Increase by 10 degrees | 22-28 minutes |
| Convection Style | 315°F | Slightly lower for even heat | 26-32 minutes |
Positioning the Pan Correctly
Proper positioning in your air fryer is key for even baking. I’m excited to share a game-changing tip with you! Place your loaf pan in the center of the basket with at least an inch of space around it.
This lets the hot air circulate evenly, avoiding hot spots and ensuring consistent baking. If your air fryer has multiple racks, use the middle one for the most even heat.
Never let your pan touch the basket sides, as this can cause uneven browning and damage your air fryer. I gently shake the basket after placing the pan to ensure it’s stable and centered.
The right pan positioning allows your banana bread to bake evenly, giving you a perfect golden color and texture. Take a moment to position your pan correctly – it makes a big difference!
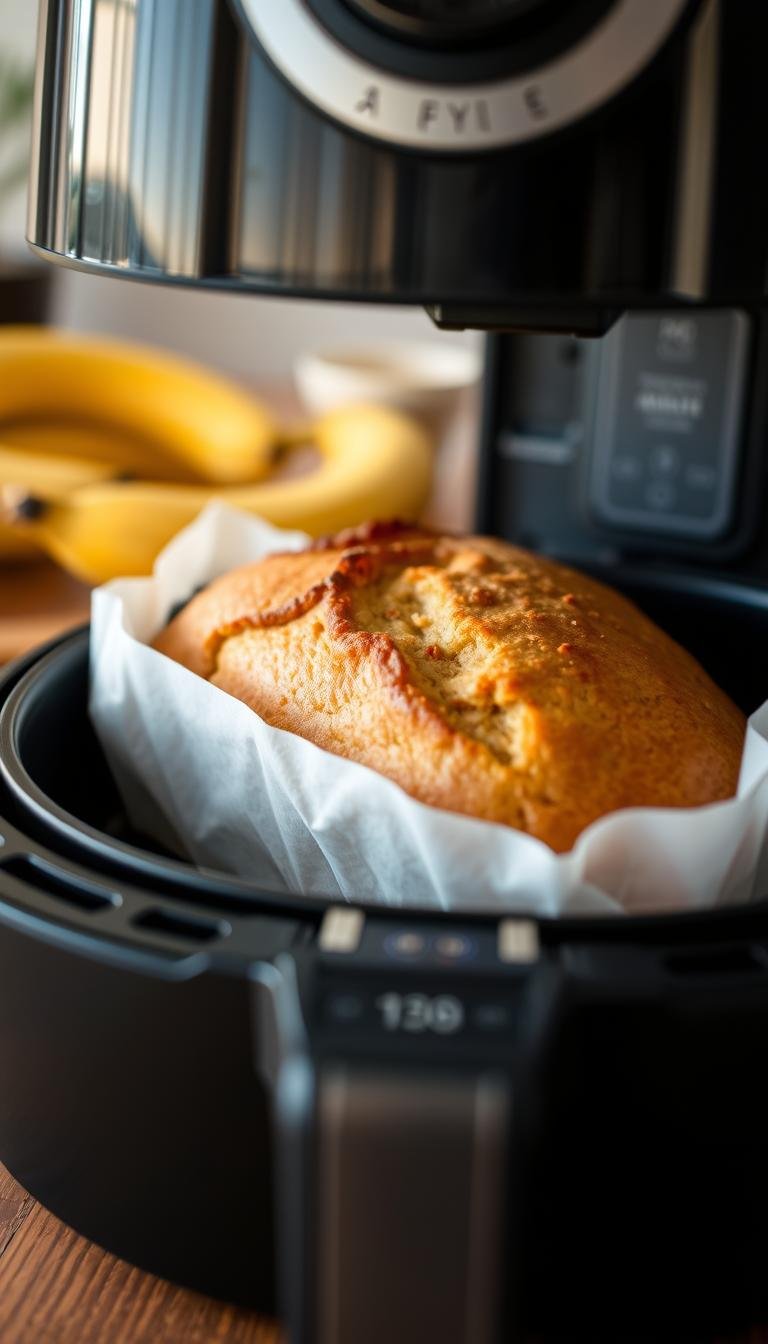
Baking Your Low Sugar Banana Bread
It’s time to bake your delicious low sugar banana bread! Your kitchen will soon fill with the incredible aroma of baking bananas and warm spices.
Air fryer baking is much faster than traditional oven methods. You’ll have fresh banana bread in about 25-30 minutes instead of waiting a full hour! The key to success lies in patience and gentle monitoring throughout the process.
Resist the urge to keep opening your air fryer to check on the bread. Each time you open it, you release heat and disrupt the cooking process. The smell is amazing, but trust the process and let your air fryer work its magic.

Starting the Initial Baking Phase
The initial baking phase is where the real magic begins! Set your timer for 15 minutes and watch your banana bread start its amazing transformation. During these first minutes, your bread will begin to rise and develop its structure.
You’ll notice the top starting to firm up and take on a light golden color. The aroma becomes more intense and absolutely heavenly – that’s your sign that everything is working perfectly! Don’t open the air fryer during this first baking phase.
The consistent heat and air circulation are key for proper rising. Your bread develops its structure and begins cooking from the outside in. This is when the baking soda activates fully, creating those beautiful air pockets that make banana bread so tender.
Monitoring Progress and Making Adjustments
After that initial 15-minute phase, you can start monitoring baking progress every 5 minutes. Look for a beautiful golden brown color developing on top – that’s your perfect indicator! Every air fryer behaves slightly differently, so flexibility is key.
If things seem to be moving too fast, don’t panic! You can adjust the temperature down by 10-20 degrees. Trust your instincts as you develop these valuable baking skills. Your bread should be rising nicely and developing that gorgeous color.
Watch for proper banana bread timing throughout the process. If the bread seems to be cooking too slowly, you can increase the temperature slightly. The key is being responsive to what you’re seeing and making small adjustments as needed.
“The secret to perfect air fryer baking is learning to read your bread’s visual cues and adjusting according.”
Preventing Over-Browning
Preventing over-browning is one of the most important skills in banana bread cooking! Air fryers can brown the top quite quickly due to intense circulating heat. But don’t worry – this is totally manageable with the right technique.
If you notice the top getting too dark while the inside continues baking, simply tent it with aluminum foil. This creates a gentle barrier that allows continued cooking without further browning. I like to check around the 20-minute mark to assess the color.
The perfect golden brown color should be beautiful and even – not too light, not too dark. If your air fryer tends to brown quickly, you can start with the aluminum foil tent from the beginning. Remove it for the last few minutes to achieve that perfect finish.
Remember, we want that gorgeous golden top that looks absolutely irresistible! Finding the balance between beautiful color and proper cooking takes practice. With a little experience, you’ll nail it every time and create the most amazing low sugar banana bread!
Testing for Doneness and Perfect Texture
Knowing when your low sugar banana bread is perfectly baked is the most exciting moment! This is where all your careful preparation and patient air frying come together. The wonderful aroma filling your kitchen tells you you’re close, but now you need to confirm that perfect texture we’ve been working toward.
Testing doneness doesn’t have to be stressful – I’ll share the foolproof methods that work every single time! The key is being thorough but gentle with your beautiful bread. A properly baked loaf will have that gorgeous golden brown color and spring back when lightly touched.
“The toothpick test is the baker’s best friend – it never lies about doneness!”
Toothpick Test Method
The toothpick test is absolutely the most reliable baking test for checking your banana bread! Insert a clean toothpick straight down into the center of your loaf – this is the thickest part that takes longest to cook through.
You want that toothpick to come out with just a few moist crumbs clinging to it. Not wet batter, not completely clean, but those perfect little crumbs that show your bread is fully cooked yet beautifully moist!
If there’s wet batter on the toothpick, give your bread another 3-5 minutes and test again. The toothpick test has never failed me – it’s your guarantee of perfect results every time!
Visual and Touch Indicators
Learning to read visual cues makes you such a confident baker! Your perfectly baked banana bread should display that gorgeous, deep golden brown color on top – not pale, not dark brown, but that beautiful golden hue that makes your mouth water.
The surface should look set and slightly firm, never jiggly or wet-looking. When you gently press the center with your finger for a quick touch test, it should spring back lightly.
You’ll also notice the edges might just start pulling away from the pan sides – that’s a fantastic sign! The wonderful baking aroma becomes more intense and complex when your bread reaches perfect doneness.
These visual and tactile indicators, combined with the reliable doneness test using a toothpick, give you complete confidence that your low sugar banana bread is perfectly baked and ready to enjoy!
Cooling and Storage Tips
Once your air fryer banana bread is done, the real fun starts with proper cooling and storage. That amazing smell is hard to resist, but waiting a bit will make it even better. You’ll get the best texture and taste.
Getting your cooling banana bread right is key. It lets the steam spread evenly, making it moist and delicious.
“The secret to perfect banana bread isn’t just in the baking – it’s in the cooling and storage that follows.”
Perfect Cooling Methods
Your cooling time begins as soon as you take the bread out of the air fryer. Let it rest in the pan for 10 minutes. This helps it set and prevents it from breaking.
After 10 minutes, carefully move the bread to a wire rack. This stops the bottom from getting soggy. If you don’t have a wire rack, a clean towel will do, but air circulation is key.
The hardest part is waiting for it to cool completely before slicing. This patience ensures it’s perfectly sliceable and textured. Cutting too soon can ruin the bread.
Smart Storage Solutions
Once it’s cool, follow these storage tips to keep it fresh. For 3-4 days, wrap it tightly in plastic wrap or store in an airtight container at room temperature.
Banana bread gets better over the first few days. It’s a great time to enjoy all the flavors. For longer storage, the freezer is your best friend.
For longer storage, wrap slices in plastic wrap and then freezer bags. They’ll last up to 3 months. You can also freeze the whole loaf, wrapped in plastic and foil.
Freezing individual slices makes for quick snacks. To thaw, leave them at room temperature for 30 minutes or warm them in the toaster.
Never store banana bread in the refrigerator. It makes it stale faster. Keep it at room temperature or in the freezer for the best texture and flavor.
Troubleshooting Common Issues
Let’s tackle the most common banana bread problems together – you’ll master this recipe in no time! Every baker encounters challenges, and the key is understanding what went wrong so you can fix it next time. I’ve made every mistake in the book while perfecting this recipe, and each “oops” moment taught me something valuable!
The most common issues with air fryer banana bread are usually related to temperature, timing, or ingredient ratios – all totally fixable problems. The wonderful thing about banana bread is that it’s quite forgiving, and even less-than-perfect loaves are usually delicious!
Troubleshooting doesn’t have to be stressful when you know the right solutions. Most problems have simple fixes, and once you understand the “why” behind the issue, you’ll prevent it in the future!
Dense or Heavy Texture Problems
Dense banana bread is usually caused by overmixing or incorrect ingredient ratios, but it’s totally fixable! Overmixing develops the gluten too much, creating a tough, heavy texture instead of the light, fluffy bread we want.
Remember, once you add the flour, mix just until you can’t see any flour streaks – those few lumps are perfectly fine! Another common cause is using too much flour, which can happen if you scoop directly from the bag instead of spooning it into your measuring cup.
Too little leavening (baking soda) can also create density issues. Make sure your baking soda is fresh – it loses potency over time! If your bananas weren’t ripe enough, they won’t provide enough natural moisture and sweetness, leading to a heavier texture.
The solution for fixing dense bread is simple: use very ripe bananas, measure flour correctly by spooning and leveling, and mix gently! Your next loaf will be perfectly light and fluffy.
Uneven Cooking Solutions
Uneven cooking in air fryer banana bread is usually a positioning or temperature issue, and I’ve got great solutions for you! If your bread is cooking faster on one side, it might be too close to the heating element or not centered properly in the basket.
Make sure your pan is positioned right in the center with equal space around all sides for proper air circulation! Some air fryers have hot spots, so if you notice consistent uneven browning, try rotating your pan halfway through baking.
If the top is cooking much faster than the inside, your temperature might be too high – try reducing by 10-20 degrees and extending the baking time slightly. Using a light-colored metal pan can help prevent over-browning compared to dark pans.
The key to even baking is getting to know your specific air fryer’s personality – once you understand how it behaves, you can adjust for perfect results every time!
Sweetness Level Adjustments
Adjusting sweetness levels is so personal, and I love helping you find your perfect balance! If your banana bread isn’t sweet enough, remember that very ripe bananas provide the most natural sweetness.
Next time, use bananas that are even more overripe with lots of brown spots. You can also increase your sugar substitute slightly, but do it gradually – add just a little more next time and taste-test your batter.
If it’s too sweet, reduce the sweetener by about 25% next time, or use less ripe bananas. Different sugar substitutes have varying sugar levels, so you might need to experiment to find your favorite!
Adding a pinch of salt can actually enhance sweetness perception without adding more sweetener. Spices like cinnamon and vanilla also add perceived sweetness without actual sugar.
| Problem | Common Causes | Quick Solutions | Prevention Tips |
|---|---|---|---|
| Dense Texture | Overmixing, too much flour, old baking soda | Mix gently, measure flour correctly, use fresh leavening | Spoon and level flour, mix until just combined |
| Uneven Cooking | Poor positioning, hot spots, wrong temperature | Center pan, rotate halfway, adjust temperature | Know your air fryer, use light-colored pans |
| Wrong Sweetness | Banana ripeness, incorrect substitute ratios | Adjust bananas or sweetener gradually | Use very ripe bananas, taste-test batter |
| Dry Texture | Overbaking, insufficient moisture | Reduce time, add extra mashed banana | Check doneness early, use proper ratios |
Remember, fixing issues is part of the learning process! Even experienced bakers encounter challenges, and each attempt teaches you something new about your air fryer and ingredients.
The goal is finding your family’s perfect taste preferences – you can always serve slices with a drizzle of honey or maple syrup if you want extra sweetness! Don’t get discouraged – even imperfect banana bread tastes great, and you’re building valuable baking skills with every loaf.
Delicious Variations and Add-ins
Explore the exciting world of banana bread variations for a new adventure every time! This low sugar recipe is perfect for adding creative add-ins and flavors. You can turn your banana bread into something unique every time you bake!
I love trying different variations – it’s like having dozens of recipes in one! The key is to find the right mix where your add-ins enhance the banana flavor. Whether you want something nutty, fruity, or spiced, there’s a mix that will make your taste buds happy.
“The secret to great banana bread variations is restraint – choose one or two complementary add-ins, not too many.”
Nutritious Mix-in Options
Healthy add-ins boost nutrition and flavor in your banana bread. These additions make your loaf more satisfying and add great texture and taste.
Nuts add amazing crunch and healthy fats. Chopped walnuts or pecans are perfect – about 1/2 cup is just right. They add richness without being too much, and the texture is wonderful!
Seeds add nutrition and interesting texture. Chia seeds have omega-3s and fiber, while ground flaxseed adds nutty flavor. Pumpkin seeds or sunflower seeds add crunch and are full of nutrients.
For dried fruit, try unsweetened cranberries, chopped dates, or raisins. They add natural sweetness and chewy texture that goes well with bananas. Fresh blueberries also work great, adding bursts of flavor to every slice!
Don’t overload your batter – pick one or two mix-ins and use about 1/2 to 3/4 cup. This keeps your banana bread balanced and prevents it from getting too dense.
- Chopped walnuts or pecans (1/2 cup)
- Chia seeds or ground flaxseed (2 tablespoons)
- Unsweetened coconut flakes (1/3 cup)
- Sugar-free dark chocolate chips (1/2 cup)
- Fresh or dried blueberries (1/2 cup)
Creative Flavor Combinations
Flavor variations let you get creative and make this recipe your own! These simple additions can turn your banana bread into completely different treats.
Spices add warmth and complexity. Cinnamon is classic – try 1/2 teaspoon for a cozy, bakery-style taste. Nutmeg, allspice, or pumpkin pie spice make amazing fall versions that smell incredible while baking!
For tropical flavors, coconut extract with coconut flakes takes you to paradise. Extracts are powerful for creating unique banana bread flavors. Almond extract gives a sophisticated taste, while vanilla bean paste adds extra richness.
Citrus additions brighten your bread beautifully! Lemon zest adds fresh, bright notes that make your bread feel refreshing. Orange zest with a touch of orange extract creates a delightful citrusy version perfect for spring.
For chocolate lovers, adding 2 tablespoons of unsweetened cocoa powder makes rich chocolate-banana bread that’s irresistible. You can also make seasonal versions – like pumpkin spice in fall or peppermint extract during the holidays!
- Classic Cinnamon: 1/2 teaspoon ground cinnamon
- Tropical Coconut: 1/4 teaspoon coconut extract + 1/3 cup coconut flakes
- Lemon Zest: Zest of 1 large lemon
- Chocolate Banana: 2 tablespoons unsweetened cocoa powder
- Almond Delight: 1/4 teaspoon almond extract
Start with small amounts and build up to your preferred intensity – extracts are potent, so a little goes a long way! These flavor combinations make your banana bread feel like a new treat every time you bake.
Conclusion
You now have all the tools and knowledge to make delicious easy banana bread. This air fryer method makes baking quick and efficient. It gives amazing results every time.
This recipe is simple and flexible. Your success in the air fryer depends on following the temperature and timing we’ve shared. The natural sweetness of ripe bananas and smart sugar substitutes show that healthy baking doesn’t mean losing flavor.
Each loaf you make will get better as you get more confident with your air fryer. The 30-minute baking time means you can enjoy fresh banana bread whenever you want. No more waiting hours for your oven to do what your air fryer does quickly!
Baking is about experimenting and finding what you like. Start with the basic recipe, then try the variations we’ve discussed. Your family will love having this nutritious treat without the guilt of traditional high-sugar versions.
Get ready to fill your kitchen with the incredible aroma of freshly baked banana bread. Your air fryer is about to become your favorite baking companion!