
(Hey! Some links in this post may be affiliate links — meaning I may earn a small commission if you buy through them, at no extra cost to you. As an Amazon Associate, I earn from qualifying purchases. I only share products I genuinely love and think you’ll find useful too. Read the full disclosure here).
Welcome to my kitchen, where we’re about to create something absolutely magical together! I’m so excited to share this incredible recipe with you.
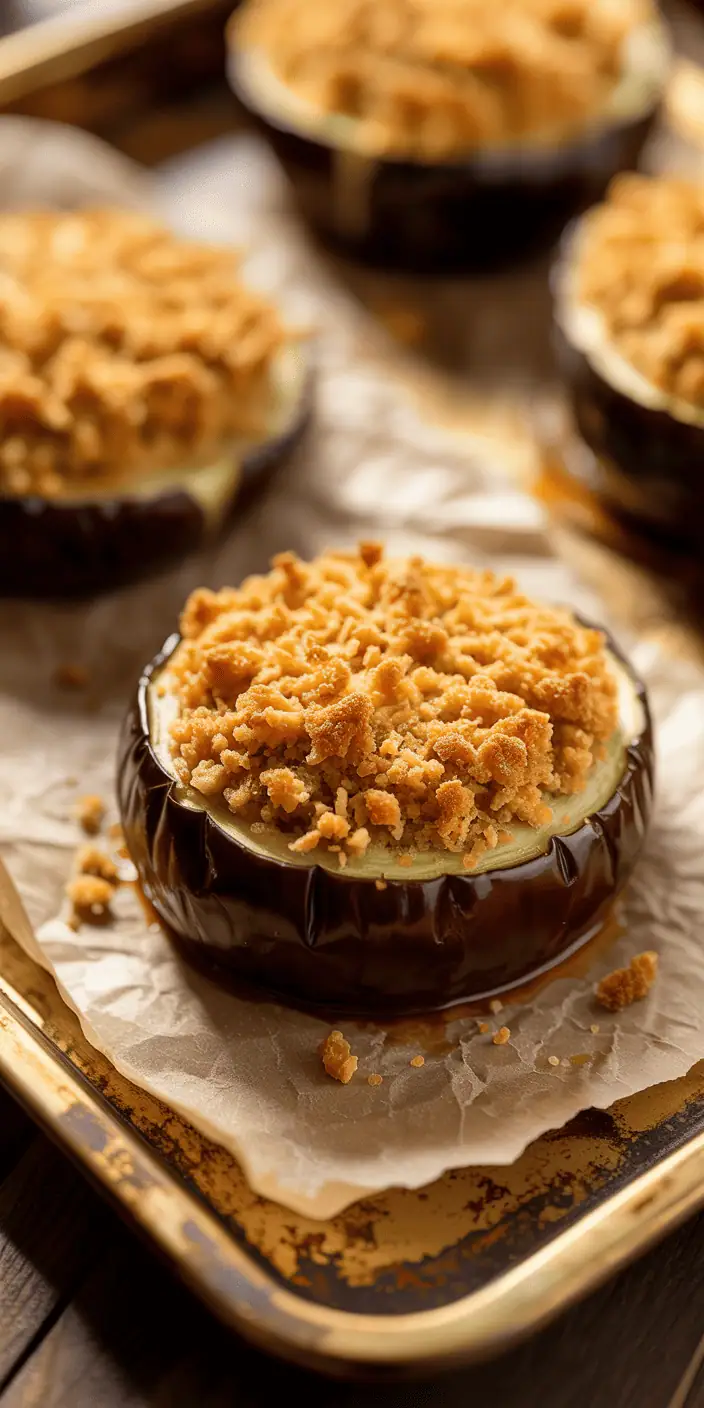
These crispy eggplant fritters are the perfect appetizer for any gathering. Trust me, once you master this technique, you’ll be making them all the time!
The combination of tender, creamy filling inside a perfectly seasoned, crunchy coating is simply irresistible. Paired with a cool, refreshing yogurt dip, these golden treats never fail to impress guests.
Whether you’re hosting a dinner party or looking for a delicious vegetarian option, these homemade eggplant fritters will become your new favorite go-to recipe. I’ll walk you through every single step, sharing all my best tips and tricks along the way!
Contents
- 1 What Makes Perfect Eggplant Fritters
- 2 Essential Ingredients and Equipment
- 3 Preparing Your Eggplant Step by Step
- 4 Creating the Perfect Crispy Batter
- 5 Frying Your Eggplant Fritters to Golden Perfection
- 6 Crafting the Creamy Yogurt Dip
- 7 Troubleshooting Common Issues
- 8 Serving Suggestions and Storage
- 9 Your Eggplant Fritter Journey Ends Here
Key Takeaways
- Perfect appetizer that impresses guests at any gathering or dinner party
- Features tender, creamy interior with a perfectly seasoned crunchy coating
- Pairs beautifully with cool, refreshing yogurt dip for balanced flavors
- Excellent vegetarian option that satisfies both meat-eaters and plant-based diners
- Step-by-step guidance with professional tips for restaurant-quality results at home
- Versatile recipe suitable for entertaining, family meals, or trying something new
What Makes Perfect Eggplant Fritters
What transforms ordinary eggplant into crispy, golden perfection? Let me share the secrets! The difference between good and amazing fried eggplant recipe results comes down to mastering three essential elements that work together beautifully.
Moisture control is absolutely everything! Eggplant naturally holds tons of water, and this can be your biggest enemy or your greatest ally. When you properly salt and drain your eggplant slices, you’re not just removing excess moisture – you’re concentrating those incredible flavors that make this eggplant appetizer so irresistible.
The batter creates that magical contrast we all crave. It needs to be light enough to puff up beautifully but substantial enough to create a protective golden shell around each tender piece. I’ve found that the perfect batter should coat the back of a spoon without being too thick or too thin.
The secret to great frying is patience and the right temperature – rush the process, and you’ll end up with disappointment on your plate.
Temperature control separates the pros from the beginners. Too hot, and you’ll get burnt outsides with raw centers. Too cool, and your fritters become greasy sponges that nobody wants to eat!
| Aspect | Good Fritters | Perfect Fritters |
|---|---|---|
| Exterior | Lightly golden | Deep golden and crispy |
| Interior | Cooked through | Creamy and melting |
| Oil absorption | Slightly greasy | Minimal oil content |
| Flavor | Pleasant | Concentrated and rich |
The perfect fritter delivers that satisfying crunch followed by creamy, flavorful eggplant that practically melts on your tongue. Serve them immediately while they’re hot and crispy, paired with cool, tangy yogurt dip for the ultimate flavor experience!
Essential Ingredients and Equipment
Let me walk you through everything you’ll need to create these incredible golden eggplant fritters with yogurt dip recipe! I always say that great cooking starts with quality ingredients and the right tools. It makes all the difference in creating fritters that are crispy on the outside and tender on the inside.
Choosing the Right Eggplant
The key to amazing fritters starts with selecting the perfect eggplant! Look for ones that feel heavy for their size with smooth, shiny skin. When you press gently, the skin should bounce back.
Avoid any eggplants with soft spots or wrinkled skin – those are past their prime. Medium-sized eggplants work best because they have fewer seeds and more tender flesh. Trust me on this one!
Batter Components
Your batter is what creates those golden, crispy exteriors we’re after! Here’s what you’ll need:
- All-purpose flour – your base for that perfect coating
- Cornstarch – my secret weapon for extra crispiness!
- Eggs – for binding everything together
- Sparkling water or beer – the bubbles create amazing light texture
- Spices – salt, pepper, garlic powder, and paprika for incredible flavor
- Baking powder – just a pinch for that airy texture
Required Kitchen Tools
Having the right equipment makes this process so much smoother! You’ll need:
- Large, heavy-bottomed pot or deep fryer – for consistent heat distribution
- Candy thermometer – super important for monitoring oil temperature!
- Wire rack and paper towels – for proper draining
- Mixing bowls, whisk, and tongs – for safe, easy handling
Trust me, having everything ready and organized before you start makes the whole experience more enjoyable!
Preparing Your Eggplant Step by Step
Getting your eggplant ready is where the magic truly begins for this easy eggplant recipe! This preparation stage makes all the difference between soggy, bitter fritters and the crispy, golden perfection we’re aiming for. I can’t stress enough how crucial these next steps are – they’re what transform ordinary eggplant into an incredible Mediterranean appetizer that’ll have everyone asking for your secret!
Let me walk you through each technique that guarantees amazing results every single time. Trust me, once you master these simple preparation methods, you’ll feel confident making this dish for any occasion!
Proper Slicing Techniques
Your knife work sets the foundation for perfect fritters! I always cut my eggplant into rounds that are exactly ½ inch thick – this thickness is absolutely perfect. Too thin and your slices will fall apart in the oil. Too thick and they won’t cook evenly through the center.
Here’s my grandmother’s secret trick: slice slightly on the diagonal! This gives you more surface area for that gorgeous golden crust and makes for much prettier presentation. Keep all your slices uniform so they cook at exactly the same rate.
Salt Treatment Process
Now comes the game-changing step that most people skip – and they always regret it! Lay your eggplant slices on a large baking sheet and generously sprinkle both sides with coarse salt. Don’t be shy here – the salt is doing important work!
This magical process draws out bitter compounds and excess moisture that would otherwise make your fritters soggy. Let them sit for at least 30 minutes, though I often go for a full hour when I have time. You’ll be amazed watching those moisture beads form on the surface!
| Slice Thickness | Cooking Result | Best Use |
|---|---|---|
| ¼ inch | Falls apart easily | Not recommended |
| ½ inch | Perfect texture | Ideal for fritters |
| ¾ inch | Uneven cooking | Better for grilling |
| 1 inch | Raw center | Roasting only |
Removing Excess Moisture
After your salting time is up, you’ll see those telltale beads of moisture – that’s exactly what we want! Now grab some paper towels and pat each slice completely dry. Press gently but firmly to absorb every drop.
I never rinse the salt off because it provides perfect seasoning levels. Make sure every single slice is thoroughly dried – any remaining moisture will prevent your batter from sticking properly and create steam during frying that ruins that crispy crust we’re working so hard to achieve!
“The secret to great eggplant isn’t in the cooking – it’s in the preparation. Take time with the salting process, and your fritters will reward you with perfect texture every time.”
Creating the Perfect Crispy Batter
The magic happens when you combine the right ingredients with proper mixing techniques! This is where your vegetarian fritters transform from ordinary to absolutely incredible. I’m thrilled to share my foolproof method that guarantees crispy, golden results every single time.
Combining Dry Ingredients
Start with a large mixing bowl and gather your dry ingredients. You’ll need one cup of all-purpose flour, two tablespoons of cornstarch (my secret weapon for extra crispiness!), one teaspoon of baking powder, one teaspoon of salt, half a teaspoon of garlic powder, half a teaspoon of paprika, and a generous pinch of black pepper.
Whisk these ingredients together thoroughly! This step is crucial because it ensures even distribution and prevents those annoying lumps later. I love to sift the mixture when I have extra time – it creates an even lighter texture that makes your fritters absolutely divine.
Liquid Integration Methods
Now comes the technique that separates good fritters from great ones! Create a well in the center of your dry ingredients. Add one beaten egg, then gradually pour in three-quarters cup of cold sparkling water. Cold liquid is key – it helps create those beautiful air bubbles we want!
Here’s one of my favorite eggplant cooking tips: mix gently and minimally using a fork. Stir just until the ingredients come together. A few lumps are perfectly fine! Overmixing develops the gluten, making your batter heavy and tough.
Achieving Optimal Consistency
Your perfect batter should coat a spoon but still drip off easily. Think thick cream consistency! If it’s too thick, add liquid one tablespoon at a time. If too thin, sprinkle in a bit more flour.
The batter should feel slightly thick but never gluey. Let it rest for ten minutes before using – this allows the flour to hydrate properly and bubbles to develop. This resting period is what creates that perfect light, crispy coating that makes vegetarian fritters absolutely irresistible!
Frying Your Eggplant Fritters to Golden Perfection
Now comes the most thrilling part of our eggplant fritter journey – transforming those prepared slices into golden, crispy perfection! This is where all your careful prep work pays off in the most delicious way possible. Get ready to watch the magic happen right before your eyes!
Setting Up Your Frying Station
Organization is absolutely key to successful frying, and I can’t stress this enough! Start by arranging everything in a logical flow that makes sense. Place your prepared eggplant slices on one side, your bowl of batter in the middle, and a wire rack set over a baking sheet on the other side for draining.
Keep paper towels within arm’s reach for any spills or splashes. Make sure your tongs are easily accessible – you’ll be using them constantly! Having everything organized this way makes the entire process smooth and stress-free, plus it keeps you safe around hot oil.
Temperature Control and Oil Management
Fill your heavy-bottomed pot with about 3 inches of neutral oil like vegetable or canola oil. The perfect frying temperature is exactly 350°F, and I always use a candy thermometer to get it just right! This temperature creates that gorgeous golden exterior while cooking the eggplant completely through.
If your oil gets too hot, the outside burns before the inside cooks properly. Too cool, and you’ll end up with greasy, soggy fritters – definitely not what we want! Maintaining that perfect frying temperature throughout the cooking process is absolutely crucial for success.
Coating and Frying Technique
Here’s where the real magic happens with your crispy coating! Dip each eggplant slice into the batter, making sure it’s completely coated. Let the excess batter drip off – you want coverage, not a thick, heavy layer.
Never overcrowd your pot! Fry only 3-4 pieces at a time to maintain that perfect oil temperature. Gently lower each piece into the oil away from you to avoid any dangerous splashing.
First Batch Preparation
Watch for that beautiful sizzling and bubbling – it’s so satisfying! Fry for about 2-3 minutes on the first side until you see that gorgeous golden brown color developing. Carefully flip each piece with your tongs and fry another 2-3 minutes on the other side.
The color should be a beautiful, even golden brown all over. That’s your visual cue that you’ve achieved crispy coating perfection! Transfer each fritter immediately to your wire rack for proper draining.
Maintaining Consistent Results
Monitor your oil temperature constantly throughout the entire process! The temperature will drop when you add food, so adjust your heat as needed. Between batches, use a slotted spoon to skim any batter bits from the oil – they can burn and affect the flavor.
Let the oil return to that perfect 350°F before adding your next batch. Each finished fritter should sound crispy when you tap it gently – that’s how you know you’ve nailed that perfect texture we’re after! Listen for that satisfying crunch – it’s music to any cook’s ears.
Crafting the Creamy Yogurt Dip
Nothing complements crispy eggplant fritters quite like a cool, creamy Mediterranean dip! This tangy yogurt sauce provides the perfect contrast to those golden, hot fritters. The best part? It takes just minutes to whip up this delicious accompaniment that’ll have everyone asking for the recipe!
Base Yogurt Preparation
Start with one cup of thick Greek yogurt as your foundation. I always choose full-fat Greek yogurt because it creates the richest, creamiest homemade yogurt sauce. The natural tanginess pairs beautifully with eggplant!
If your yogurt seems thin, don’t worry! Simply strain it through a fine-mesh sieve lined with cheesecloth for thirty minutes. This removes excess whey and creates an incredibly smooth, thick base that clings perfectly to each fritter.
Flavor Enhancement Options
Here’s where we make this Mediterranean dip absolutely irresistible! Add two cloves of minced fresh garlic for that aromatic punch. Squeeze in two tablespoons of fresh lemon juice – it brightens everything up wonderfully!
Drizzle in one tablespoon of extra virgin olive oil for richness. Season with salt and pepper to taste. For fresh herb options, try chopped dill, mint, or parsley. Want authentic Mediterranean flavors? Add a pinch of dried oregano and finely diced cucumber!
Feeling adventurous? A pinch of red pepper flakes adds just the right amount of heat without overwhelming the delicate eggplant flavors.
Texture Perfection Tips
Mix all ingredients gently but thoroughly. Overworking the yogurt can make it watery, so fold everything together with care. Taste as you go and adjust seasonings – remember, this homemade yogurt sauce should complement, not overpower!
Let your dip chill in the refrigerator for at least thirty minutes before serving. This resting time allows all those wonderful flavors to meld together, creating the perfect creamy consistency that makes every bite absolutely divine!
Troubleshooting Common Issues
Making perfect eggplant fritters takes practice, but common problems have simple solutions that I’m excited to share with you! Even experienced home cooks run into challenges sometimes. That’s totally normal and part of the learning process!
Let me walk you through the most effective frying troubleshooting techniques. These methods will help you fix problems quickly and get back to creating delicious fritters.
Soggy Fritter Solutions
Soggy fritters usually happen because of excess moisture in the eggplant or incorrect oil temperature. The salt treatment step is absolutely crucial for removing water!
Make sure you’re salting your eggplant slices for at least 30 minutes. Pat them completely dry with paper towels before dipping in batter. If your fritters are already soggy, don’t panic – you can re-fry them for 30-60 seconds to restore that crispy texture!
Check that your oil stays at 350°F and avoid overcrowding the pot. Too many fritters at once drops the temperature quickly.
Batter Problems and Fixes
Batter consistency issues are easy to fix with these crispy texture tips. If your batter is too thick and clumpy, gradually whisk in more liquid one tablespoon at a time.
When batter is too thin and slides off the eggplant, sprinkle in a bit more flour. Mix gently – lumps are actually okay! Overmixing creates tough fritters.
If batter won’t stick, ensure your eggplant slices are completely dry before dipping. Wet surfaces prevent proper coating.
Oil Temperature Corrections
Temperature control makes the biggest difference in frying success. If your oil is too hot and fritters brown too quickly, remove the pot from heat for a few minutes.
When oil is too cool, fritters absorb oil and get greasy. Increase heat and wait for 350°F before continuing. A candy thermometer takes the guesswork out of temperature management!
| Problem | Cause | Quick Fix |
|---|---|---|
| Soggy texture | Excess moisture or low oil temperature | Re-fry for 30-60 seconds |
| Thick batter | Too much flour or not enough liquid | Add liquid one tablespoon at a time |
| Thin batter | Too much liquid | Sprinkle in more flour gradually |
| Oil too hot | Heat setting too high | Remove from heat temporarily |
Remember, cooking is all about learning and adjusting, so don’t get discouraged if your first batch isn’t perfect!
Serving Suggestions and Storage
Now that you’ve mastered the art of making crispy eggplant fritters, let’s explore how to present these golden beauties in style! The right serving approach can transform your homemade fritters into a stunning centerpiece that’ll have your guests reaching for seconds.
Best Presentation Methods
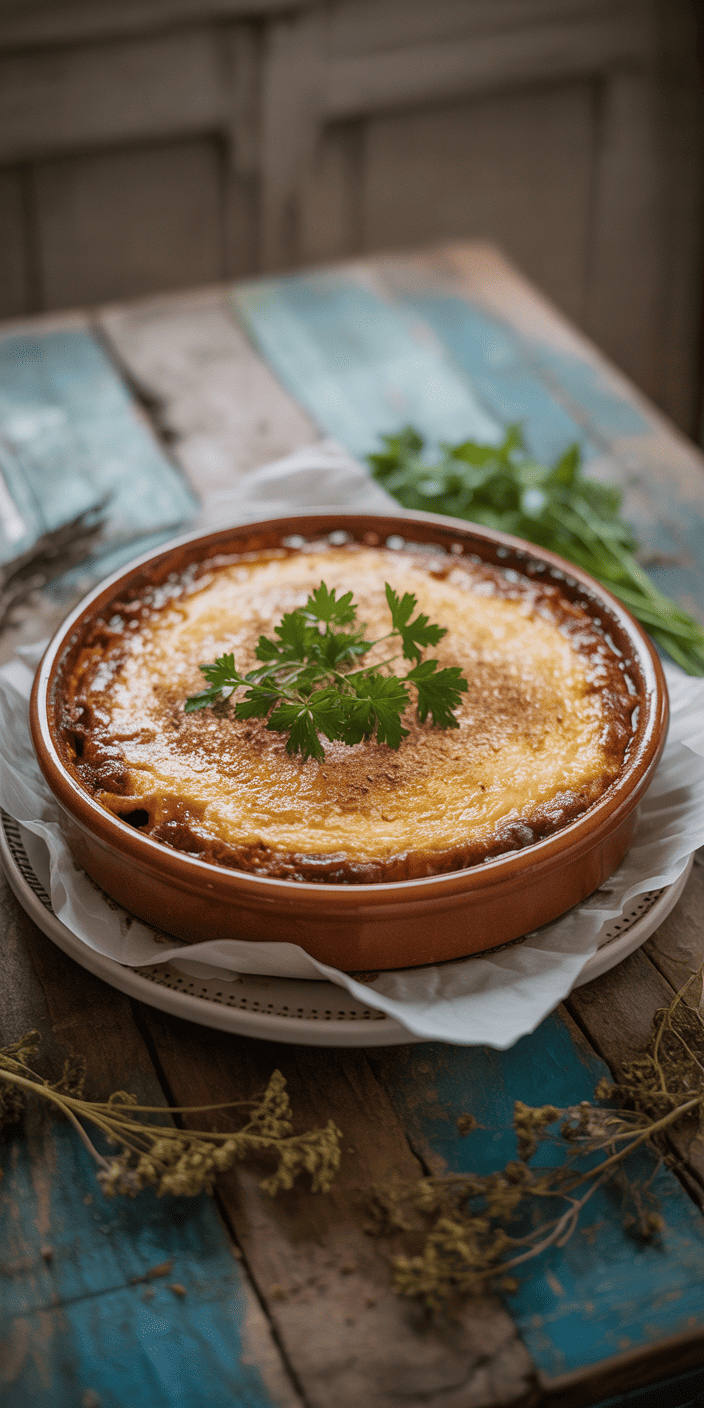
Your appetizer presentation starts with choosing the perfect serving vessel. I love using a rustic wooden board or colorful ceramic platter – these really make the golden fritters pop visually!
Arrange your fritters in a single layer across the platter. Never stack them or they’ll lose that precious crispiness we worked so hard to achieve! Place your creamy yogurt dip in a beautiful small bowl right in the center.
For the finishing touches, garnish with fresh herbs like parsley or dill. Add lemon wedges around the edges for extra color and freshness! For elegant dinner parties, try individual small plates with 2-3 fritters each and a dollop of dip on the side.
Storage and Reheating Guidelines
Let’s be honest – fritters taste best when served immediately while hot and crispy. However, life happens, and sometimes we need smart leftover storage solutions!
Store leftover fritters in the refrigerator for up to 2 days in an airtight container. Skip the microwave for reheating – it makes them soggy! Instead, use your oven at 400°F for 5-7 minutes, or pop them back in a skillet with a little oil for 1-2 minutes per side.
The yogurt dip actually improves with time and keeps beautifully in the fridge for up to 5 days. The flavors just get better and better!
Your Eggplant Fritter Journey Ends Here
You’ve mastered the art of creating golden, crispy homemade fritters that bring Mediterranean flavors right to your kitchen! These eggplant beauties paired with creamy yogurt dip make every bite a celebration of taste and texture.
Your cooking success depends on remembering the key steps we covered. Salt your eggplant properly, keep that batter light and airy, and maintain steady oil temperature. Each batch you make will boost your confidence and improve your technique!
These fritters work perfectly for casual weeknight dinners or impressive party appetizers. Your family and friends will ask for the recipe every single time. The crispy exterior and tender eggplant inside create that perfect contrast we all crave.
Don’t stress if your first attempt isn’t restaurant-perfect. Even experienced cooks need practice with frying techniques. Focus on enjoying the process and savoring those amazing homemade fritters fresh from the oil.
Keep experimenting with different spice combinations in your yogurt dip. Try adding fresh herbs, garlic, or even a squeeze of lemon. Your creativity will make these fritters uniquely yours. Happy frying, and enjoy every crispy, delicious bite!
🍆 Love eggplant? Explore more dishes in our roundup: 15 Delicious Eggplant Recipes You Need to Try


One Comment