(Hey! Some links in this post may be affiliate links — meaning I may earn a small commission if you buy through them, at no extra cost to you. As an Amazon Associate, I earn from qualifying purchases. I only share products I genuinely love and think you’ll find useful too. Read the full disclosure here).
Welcome to my kitchen, where we’re making the best banana bread recipe ever! I’m excited to share this healthy twist on a classic. Your home will smell amazing, and your taste buds will be happy.
This isn’t just any banana bread. It’s a nutritious powerhouse that shows healthy baking can be tasty. We’ll turn those ripe bananas into a moist, flavorful treat. It’s great for breakfast, snacks, or dessert.
I’ve worked hard to make this recipe both healthy and easy to make. You don’t need to be a pro baker. Just be excited! I’ll show you how to make this treat that everyone will love.
Contents
- 0.1 Why Choose Healthy Banana Bread Over Traditional Recipes
- 0.2 Essential Ingredients for Healthy Banana Bread
- 0.3 Kitchen Equipment and Tools You’ll Need
- 0.4 Preparing Your Ingredients
- 0.5 Step-by-Step Healthy Banana Bread Recipe
- 0.6 Proper Baking Techniques
- 0.7 Testing for Doneness
- 0.8 Cooling and Storage Best Practices
- 0.9 Delicious Variations and Add-ins
- 0.10 Troubleshooting Common Issues
- 0.11 Nutritional Benefits and Information
- 0.12 Serving Suggestions and Pairings
- 1 Healthy Banana Bread
Why Choose Healthy Banana Bread Over Traditional Recipes
Switching to healthy banana bread is a total game-changer. Traditional recipes are loaded with refined sugar, white flour, and unhealthy fats. These ingredients make your blood sugar swing wildly. You might feel great for 20 minutes, then crash hard.
Our healthy banana bread recipe is a game-changer. We swap out bad ingredients for nutrient-dense alternatives. This keeps you full and energized for hours. We use almond flour or whole wheat instead of white flour, adding fiber and protein.
Replacing white sugar with natural sweeteners like mashed bananas, honey, or maple syrup is key. These sweeteners don’t raise blood sugar like white sugar does. They also add amazing flavor to every bite.
Healthy baking doesn’t mean you have to give up taste. It means you get to enjoy it even more! Using Greek yogurt or avocado instead of butter adds moisture and richness. It also boosts the nutritional value of your banana bread.
This approach lets you enjoy banana bread without guilt. You get fiber for digestion, protein for energy, and healthy fats for your brain. It’s like having your cake and eating it too, but it’s banana bread and it’s good for you!
The best part? You won’t miss the traditional version at all! The texture is moist and tender, and the banana flavor is even better. When you choose healthy baking, you’re fueling your body with ingredients that care about you.
Essential Ingredients for Healthy Banana Bread
The secret to amazing healthy banana bread is in the right ingredients. I’m excited to share my top picks with you. Each ingredient is key to making your bread moist and tender while adding nutrition.
Choosing quality ingredients makes your banana bread a treat that’s good for you. Let’s explore each essential part that makes your bread special!
Choosing the Right Bananas
The bananas are the main attraction. You want beautifully spotted, super-ripe bananas that are almost too soft to eat. These bananas are full of natural sugars and have a strong banana flavor.
Look for bananas with brown spots on at least half the peel. They should feel soft when you squeeze them. Overripe bananas mash well and add moisture and sweetness to your batter.
Healthy Flour Alternatives
Our recipe uses whole wheat flour instead of traditional white flour. It adds fiber, protein, and nutrients while keeping the texture nice. Whole wheat pastry flour is even better because it’s lighter but keeps the nutritional benefits.
Want to try something different? Here are some great alternatives:
- Oat flour – Makes the bread incredibly moist and adds a nutty flavor
- Almond flour – Adds protein and healthy fats, and it’s gluten-free
- Spelt flour – Has a slightly sweet taste and is easier to digest
You can mix up to half of the whole wheat flour with these options for different flavors and textures!
Natural Sweeteners and Sugar Substitutes
Goodbye to refined sugar and hello to natural sweeteners that are good for you! Pure maple syrup is my favorite because it adds flavor and minerals like manganese and zinc. Raw honey is also great, bringing its own floral notes.
For a special touch, try mashed dates or date paste. They add caramel-like sweetness and fiber. Coconut sugar is another good choice that doesn’t raise blood sugar as much as regular sugar.
Start with about ¾ the amount of liquid sweetener you’d use in regular sugar. You can adjust to taste!
Healthy Fat Options
We replace traditional butter with healthier options that add moisture and flavor. Greek yogurt is amazing because it adds protein and makes the bread tender and moist.
Here are my favorite healthy fat substitutions:
- Unsweetened applesauce – Adds moisture with little fat
- Mashed avocado – Adds healthy fats and rich texture
- Coconut oil – Use melted for tropical flavor and healthy fats
These alternatives make your banana bread healthier and give it a tender crumb. Your family will love it without even noticing it’s healthier!
Kitchen Equipment and Tools You’ll Need
Let’s get the basic tools ready for baking banana bread. I like keeping things simple and easy to find. You don’t need fancy or expensive tools to make amazing healthy banana bread.
This recipe is easy and simple. Most people already have what they need in their kitchen.
Essential Baking Equipment
Your 9×5 inch loaf pan is key! Metal pans are best for even baking. Glass pans work too, but baking time might vary.
A potato masher or large fork is perfect for mashing bananas. Either tool will work great.
Use parchment paper or cooking spray for easy bread release. Stuck bread is a big problem!
A rubber spatula helps mix ingredients gently. This keeps your bread soft and fluffy.
The secret to great baking isn’t fancy tools. It’s knowing your ingredients and handling them with care.
Measuring Tools and Mixing Bowls
Accuracy is key in baking. Get your measuring cups and spoons ready. You’ll need both dry and liquid measuring cups.
A large mixing bowl for wet ingredients and a smaller one for dry ingredients. This keeps things organized and prevents lumps.
When using natural sweeteners or flour alternatives, precise measurements are vital. A set of nested measuring cups is very helpful.
A whisk or wooden spoon is great for mixing. Having a stand mixer is nice, but not necessary.
The most important thing? Your enthusiasm and desire to make something tasty! With these basic tools, you’re set to start baking healthy banana bread.
Preparing Your Ingredients
Spending time on ingredient prep turns your banana bread into a moist banana bread masterpiece! This step is key for great results. When you prep well, mixing and baking are smooth.
Getting each ingredient ready right ensures consistent results. A bit of extra effort here greatly improves flavor and texture!
Mashing Bananas to Perfect Consistency
The secret to amazing moist banana bread is in mashing bananas right. Aim for mostly smooth with a few small lumps. These lumps add bursts of banana flavor.
I use a sturdy potato masher for this. Place ripe bananas in a large bowl and mash. A large fork works well if you don’t have a masher.
Here’s what I look for in perfectly mashed bananas:
- Mostly smooth texture with no large chunks
- Small lumps about the size of peas scattered throughout
- Creamy consistency that spreads easily
- Natural banana juices released during mashing
Measuring Dry Ingredients Accurately
Accurate measuring is key for moist banana bread success! I use the spoon-and-level method for flour. This prevents packing and ensures consistent results.
My foolproof technique: Spoon flour into the measuring cup without packing. Level off the top with a straight knife edge. This method gives you the exact amount for tender, fluffy bread.
For other dry ingredients like baking soda and salt, I use measuring spoons and level them off too. Consistency in measuring leads to consistency in your final product!
Room Temperature Considerations
Room temperature ingredients are essential for proper mixing and texture! Cold ingredients don’t blend well and can make the loaf dense.
I take my eggs and dairy products out about 30 minutes before baking. This simple step improves mixing! Your wet ingredients will mix smoothly, creating a better batter.
Quick tips for bringing ingredients to room temperature:
- Place eggs in warm water for 5-10 minutes if you forgot to take them out early
- Cut butter into small pieces to speed up softening
- Microwave milk for 10-15 seconds if needed
Trust me, this little bit of planning makes all the difference! Your moist banana bread will have better texture and more even mixing when everything starts at the same temperature.
Step-by-Step Healthy Banana Bread Recipe
Get ready to make this incredible homemade banana bread that will make your kitchen smell amazing! I’m excited to guide you through each step. This is where the magic happens, and we’ll make sure your bread is moist and delicious every time.
This recipe is simple and lets each ingredient shine. You’ll be amazed at how these wholesome ingredients turn into something truly spectacular!
Mixing the Wet Ingredients
Start by using a large mixing bowl. This is where we’ll make the base of our homemade banana bread. Add your mashed bananas, eggs, natural sweetener, and healthy fat first.
Whisk everything together until it’s smooth and fragrant. The bananas should be fully mixed, and you’ll see a beautiful golden color. This takes about 2-3 minutes of gentle whisking.
Don’t worry if you see banana chunks. They add great texture to your bread!
Combining Dry Ingredients
In a separate bowl, whisk together your flour alternative, baking soda, salt, and spices. I like adding cinnamon or vanilla extract for extra flavor.
Whisk these dry ingredients well to ensure they’re evenly distributed. This step helps avoid any baking soda or salt pockets in your bread.
Folding Wet and Dry Ingredients Together
The most important technique for tender banana bread is folding. Pour your dry ingredients into the wet mixture bowl.
Use a wooden spoon or spatula to gently fold the ingredients. Think of it as giving the batter a gentle hug, not a hard stir.
Stop mixing when you can’t see any dry flour streaks. The batter should look lumpy and rustic. Overmixing is the enemy of tender bread, so don’t overdo it.
Adding Optional Mix-ins
Now, it’s time to get creative with your homemade banana bread! If you’re adding nuts, chocolate chips, or dried fruit, fold them in gently.
Use about ½ to ¾ cup of mix-ins. Chopped walnuts, dark chocolate chips, or blueberries work well.
Coat any add-ins with flour first to prevent them from sinking. Your batter is now ready for the oven, and your kitchen will soon smell amazing!
Proper Baking Techniques
Perfecting nutritious banana bread starts with mastering basic baking skills. I’m excited to share these techniques with you! They ensure your loaf turns out golden and moist, unlike a dense, disappointing one. Let’s go through each step for top-notch results every time.
Oven Temperature and Rack Position
Temperature control is critical for your banana bread success! Always preheat your oven to 350°F (175°C). This temperature gives a golden crust and cooks the center just right.
Place your oven rack in the center for even heat. This prevents the top from browning too fast and ensures the bottom cooks well. This simple trick fixes many baking issues!
Never skip preheating – your oven needs 15-20 minutes to get to the right temperature. An oven thermometer is your best friend, as many ovens are off by a few degrees.
Choosing the Right Pan Size
A 9×5 inch loaf pan is perfect for this recipe! It gives the banana bread its classic shape and cooks evenly.
I prefer metal pans over glass because they heat better. Metal pans give that golden look we all love, while glass can make the bread look pale.
Grease your pan well with butter or cooking spray. Dusting it lightly with flour helps prevent sticking.
Baking Time Guidelines
Baking time is usually 55-65 minutes, but every oven is different! Don’t just rely on the timer. Your eyes and hands are better at judging when it’s done.
Look for these signs: the top should be golden and spring back when touched. The edges should start to pull away from the pan. Patience is key – rushing can lead to disappointment!
Start checking around 50 minutes, then every 5 minutes after. It’s better to bake a bit longer than to pull out an underdone loaf!
| Pan Type | Baking Time | Temperature | Best Results |
|---|---|---|---|
| Metal 9×5 inch | 55-60 minutes | 350°F | Golden crust, even cooking |
| Glass 9×5 inch | 60-65 minutes | 325°F | Slower browning, gentle heat |
| Mini loaf pans | 25-30 minutes | 350°F | Perfect portions, faster baking |
| Muffin tins | 18-22 minutes | 375°F | Individual servings, quick bake |
Testing for Doneness
It’s time to see if your easy banana bread is done! This skill is key for all your baking. I love this moment because we’re almost ready to enjoy our yummy bread.
Feeling a bit nervous is normal. But with the right methods, you’ll know when your bread is just right!
Toothpick Test Method
The toothpick test is your best friend for checking doneness. It’s a method that’s helped bakers make perfect banana bread for ages.
Stick a clean toothpick into the loaf’s center, about two-thirds down. When you pull it out, it should have a few moist crumbs. This means your bread is ready!
If the toothpick comes out clean, your bread might be overbaked. If it’s full of wet batter, it needs more time. Try again in 5-10 minutes.
Visual and Touch Indicators
Don’t just use the toothpick. Your senses can help too! Your eyes, nose, and touch can give you clues about your bread’s readiness.
The top should be beautiful golden brown and firm when pressed. The edges should also start to pull away from the pan.
The smell is a big clue too. A sweet, banana scent means your bread is ready to cool.
| Doneness Test | What to Look For | Perfect Result | Needs More Time |
|---|---|---|---|
| Toothpick Test | Insert in center | Few moist crumbs | Wet batter on stick |
| Visual Check | Surface color | Golden brown top | Pale or light color |
| Touch Test | Gentle finger press | Springs back lightly | Leaves indentation |
| Edge Appearance | Sides of loaf | Slightly pulling away | Stil attached to pan |
Every oven is different, so trust your senses too. With practice, you’ll know when your banana bread is perfect.
Cooling and Storage Best Practices
It’s tempting to dive into that beautiful loaf right away. But, waiting patiently during cooling is key to the perfect banana bread. Getting your banana bread ingredients right is just the start. These simple steps will keep your banana bread fresh for days or even months.
Proper Cooling Techniques
The cooling process begins as soon as your banana bread comes out of the oven. Let it rest in the pan for exactly 10 minutes. This step is vital to prevent it from becoming soggy.
After 10 minutes, carefully turn your loaf onto a wire cooling rack. This allows air to circulate, preventing moisture buildup. Complete cooling usually takes about an hour. It’s worth the wait!

Never wrap or store your banana bread while it’s warm. The heat can make it soggy, ruining the texture you worked hard for.
Short-term Storage Options
Once cooled, you have several great ways to store your banana bread. Wrap it tightly in plastic wrap or use an airtight container. This keeps it fresh for up to 4 days.
Here’s a secret: banana bread gets more moist and flavorful after the first day. Store it in a cool, dry place to enhance the flavors.
- Plastic wrap for individual slices
- Airtight containers for whole loaves
- Bread boxes for daily access
- Aluminum foil for short-term freshness
Freezing for Long-term Storage
Your banana bread freezes beautifully, perfect for meal prep or unexpected guests! Wrap individual slices in plastic wrap first, then in freezer bags for up to 3 months. This keeps it fresh.
For whole loaves, wrap in plastic wrap, then aluminum foil before freezing. Label the packages with the date. I love having slices ready in the freezer for quick breakfasts or afternoon snacks!
Thawing is easy and convenient. Let slices thaw at room temperature for about 30 minutes. For a warm treat, pop frozen slices into the toaster! The banana bread ingredients stay flavorful and nutritious even after months.
The key to successful banana bread storage is protecting it from air exposure while allowing proper moisture balance.
Delicious Variations and Add-ins
Ready to make your healthy banana bread even better? It’s time to get creative! I love trying out different add-ins to make my banana bread truly special. These baking tips will help you create endless variations that your family will love.
For great variations, balance is key. You want to enhance the banana flavor without overpowering it. Start with small amounts and taste as you go.
Nut and Seed Options
Nuts and seeds add amazing texture and nutrition to your banana bread! Chopped walnuts are my top pick. They pair well with bananas and add healthy omega-3 fatty acids.
Here are my top nut and seed picks:
- Walnuts: Classic choice with rich, buttery flavor
- Pecans: Sweet and tender, perfect for special occasions
- Almonds: Sliced or chopped for delightful crunch
- Sunflower seeds: Budget-friendly option packed with nutrients
- Pumpkin seeds: Adds unique flavor and zinc
About ½ cup is the perfect amount. It adds texture without overpowering the banana flavor! These baking tips ensure your nuts stay evenly distributed throughout the loaf.
Fruit and Chocolate Additions
Fruit additions create delightful bursts of sweetness and beautiful color in every slice! Dried cranberries add tartness that balances the banana’s sweetness perfectly.
My favorite fruit and chocolate combinations include:
- Fresh blueberries: Fold in gently to prevent bursting
- Dried cranberries: Soak briefly in warm water for plumpness
- Raisins: Classic addition that never goes out of style
- Dark chocolate chips: Rich in antioxidants and pure joy!
- Mini chocolate chips: Better distribution throughout the batter
Yes, chocolate chips are totally acceptable in healthy baking! Dark chocolate contains antioxidants and adds that touch of indulgence we all crave. These baking tips help you incorporate add-ins without affecting the bread’s texture.
Spice and Flavor Combinations
Cinnamon is the classic banana bread spice, but don’t be afraid to explore other warming flavors! I love experimenting with different spice combinations to create unique flavor profiles.
Try these amazing spice and extract combinations:
- Cinnamon and nutmeg: Classic warm spice blend
- Cardamom: Exotic, floral notes that elevate the bread
- Ginger and cinnamon: Warming combination perfect for fall
- Vanilla extract: Always welcome, enhances banana flavor
- Almond extract: Creates an amazing flavor twist
Start with small amounts – ½ teaspoon of most spices is plenty! Vanilla extract can be used more generously, about 1 teaspoon per loaf.
Remember, the best baking tips come from practice and experimentation. Keep notes on your favorite combinations so you can recreate them perfectly next time!
Troubleshooting Common Issues
Every baker faces obstacles, but I’m here to help you solve common banana bread problems! Making perfect healthy desserts takes practice, and banana bread is no exception. The good news is that most issues have simple solutions.
Don’t get discouraged if your first loaf isn’t exactly what you expected. I’ve been there too! Each baking experience teaches us something new about our ovens, ingredients, and techniques.
Dense or Heavy Texture Problems
A dense, heavy banana bread usually means the batter was overmixed or you used too much flour. When making healthy desserts, gentle mixing is key!
Mix your wet and dry ingredients just until they’re barely combined. Lumps are totally fine – they’ll disappear during baking. Overmixing develops the gluten in flour, creating a tough texture.
Another culprit is measuring flour incorrectly. Always spoon flour into your measuring cup and level it off. Scooping directly from the bag packs in too much flour.
Overly Moist or Dry Results
If your banana bread turns out too dry, it’s likely overbaked or needs more moisture. Check your oven temperature with a thermometer – many ovens run hot!
For dry bread, try adding an extra mashed banana next time. You can also increase your healthy fat source slightly, whether that’s applesauce, Greek yogurt, or coconut oil.
Overly moist or gummy bread usually means it’s underbaked. The center should spring back when lightly touched. If your bananas were very ripe and watery, drain them slightly before mashing.
Uneven Baking Solutions
Uneven baking frustrates many home bakers, but it’s fixable! The most common cause is incorrect oven temperature or poor rack positioning.
Place your pan in the center of the oven, never too close to the top or bottom heating elements. Rotate the pan halfway through baking if your oven has hot spots.
An oven thermometer is your best friend here. Many ovens are off by 25-50 degrees! This small investment will improve all your baking.
| Problem | Most Likely Cause | Quick Solution |
|---|---|---|
| Dense, heavy texture | Overmixing or too much flour | Mix gently, measure flour properly |
| Too dry | Overbaking or insufficient moisture | Check oven temp, add extra banana |
| Too moist/gummy | Underbaking or overly wet bananas | Bake longer, drain excess banana liquid |
| Uneven baking | Wrong oven temperature or position | Use oven thermometer, center rack |
Remember, every oven behaves differently! Make notes after each bake about timing and temperature adjustments. With practice, you’ll master the perfect healthy banana bread every time!
Nutritional Benefits and Information
Choosing healthy banana bread variations means more than just great taste. It’s a game-changer for your health and wellness goals. Each slice is packed with essential nutrients your body needs.
This treat is not just another baked good. It’s a nutritional powerhouse that fuels your body and satisfies your sweet tooth. You can serve it to your family, knowing it’s wholesome nutrition in every bite!
Calorie and Macronutrient Breakdown
Healthy banana bread variations have an impressive nutritional profile. Each slice has about 180-220 calories, depending on the ingredients. This calorie range fits well into a balanced diet without harming your health goals.
The macronutrient balance is beautiful. You get 30-35 grams of complex carbohydrates for steady energy. The protein content is 4-6 grams per slice, thanks to Greek yogurt or protein-rich flours.
Healthy fats make up 6-8 grams per serving, from nuts, seeds, or avocado. These fats help your body absorb vitamins and keep you full longer. The fiber content is also impressive, with 3-4 grams per slice!
The best part? This bread provides steady energy without the blood sugar spikes and crashes of traditional baked goods.
Health Benefits of Key Ingredients
Ripe bananas are the star ingredient, bringing incredible health benefits. They provide potassium for heart health, vitamin B6 for brain function, and natural fiber for digestive wellness. They also have antioxidants that fight inflammation.
Using whole grain flours adds protein, fiber, and essential minerals that refined flour can’t match. These flours provide B vitamins, iron, and magnesium that support your energy levels and overall health.
Natural sweeteners like maple syrup and honey have antioxidants and minerals that processed sugar lacks. Greek yogurt adds probiotics for gut health and extra protein for muscle support. Nuts and seeds contribute omega-3 fatty acids and vitamin E.
The combination of these wholesome ingredients creates banana bread variations that nourish your body while treating your taste buds. You’re not just indulging – you’re fueling yourself with nutrients that support your active lifestyle!
This nutritious approach makes healthy banana bread perfect for active families, anyone managing their weight, or simply those who want to enjoy delicious food without compromising their health goals. Every bite supports your wellness journey!
Serving Suggestions and Pairings
Let’s explore the delicious ways to enjoy your homemade healthy banana bread! Whether it’s traditional or gluten-free, the options are endless. It’s a treat that’s perfect for any time of day.
From breakfast to evening snacks, banana bread can make any moment special. The key is finding the right pairings for different times.
Breakfast and Snack Ideas
Starting your day with a slice of gluten-free banana bread is a game-changer. Top it with Greek yogurt and fresh berries for a sweet start. It’s like having dessert for breakfast, but it’s good for you.
For a protein-packed breakfast, try French toast with banana bread. Dip slices in egg and cinnamon, then cook until golden. This works great with any banana bread!
Afternoon snacks get a boost with toasted banana bread, almond butter, and strawberries. This mix keeps you full and gives you energy. The sweetness and nuttiness are perfect together.
Healthy Toppings and Spreads
The right toppings can make each slice amazing. Natural nut butters like almond or peanut butter are fantastic. The creamy texture is a great contrast to the bread.
For a healthier treat, try cream cheese with honey. Mashed avocado with sea salt adds a savory twist. Both are great on gluten-free banana bread.
Kids love Nutella or maple syrup on their banana bread. These make healthy banana bread a special treat for lunch or after school.
| Occasion | Topping Combination | Flavor Profile | Nutritional Benefit |
|---|---|---|---|
| Breakfast | Greek yogurt + berries | Sweet and tangy | High protein and probiotics |
| Mid-morning snack | Almond butter + banana slices | Nutty and sweet | Healthy fats and potassium |
| Afternoon treat | Cream cheese + honey | Rich and smooth | Calcium and natural sweetness |
| Evening dessert | Dark chocolate chips + sea salt | Decadent and balanced | Antioxidants and minerals |
Your homemade banana bread is perfect for any gathering! Serve it at brunch, pack it in lunch boxes, or enjoy it with tea in the evening. Every bite is comforting and nourishing.
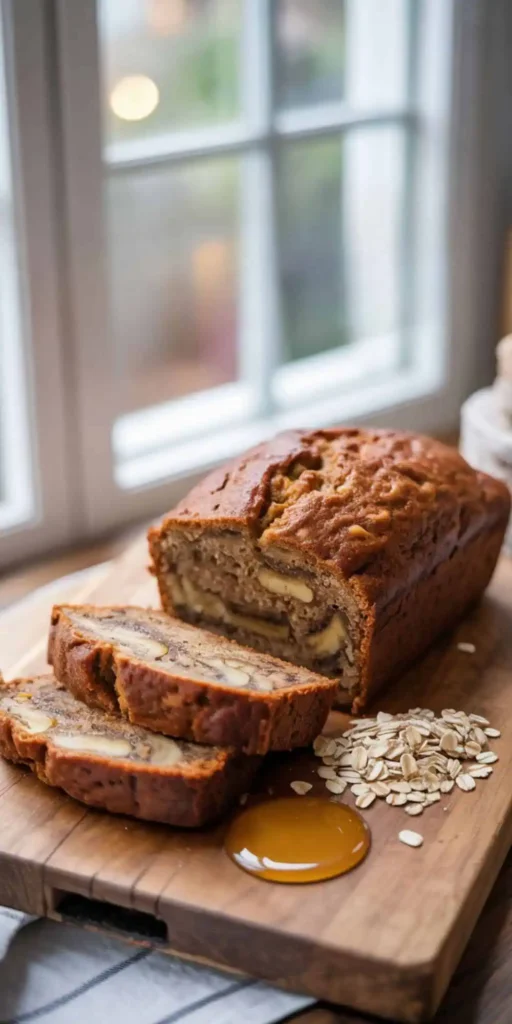
Healthy Banana Bread
Super moist, naturally sweet, and easy to make
Ingredients
- 3 very ripe bananas (mashed)
- 2 eggs
- 1/3 cup maple syrup or honey
- 1/2 cup Greek yogurt or unsweetened applesauce
- 1 tsp vanilla extract
- 1 1/2 cups whole wheat or oat flour
- 1 tsp baking soda
- 1/2 tsp cinnamon
- 1/4 tsp salt
- Optional: 1/2 cup chopped walnuts or dark chocolate chips
Instructions
- Preheat oven to 350°F (175°C). Grease a 9×5-inch loaf pan or line with parchment paper.
- In a large bowl, whisk together mashed bananas, eggs, maple syrup, yogurt, and vanilla.
- In another bowl, mix flour, baking soda, cinnamon, and salt.
- Gently fold dry ingredients into wet until just combined. Do not overmix.
- Fold in any optional add-ins like nuts or chocolate chips.
- Pour batter into prepared loaf pan and smooth the top.
- Bake for 55–60 minutes, or until a toothpick inserted in the center comes out with a few moist crumbs.
- Let cool in pan for 10 minutes, then transfer to a wire rack to cool completely.
Tips & Variations
- Use overripe bananas with lots of brown spots for the best flavor and sweetness.
- Make it gluten-free by using oat flour or almond flour.
- Add blueberries, chopped dates, or shredded coconut for variety.
- Store at room temperature for up to 4 days or freeze for up to 3 months.
Serving Suggestion:
Enjoy warm with almond butter, a drizzle of honey, or your favorite yogurt. Perfect for breakfast, snack, or a guilt-free dessert.
Conclusion
You’ve found something amazing with this healthy banana bread recipe! It’s more than just baking. It’s a way to enjoy treats that are good for you.
This recipe is super flexible. It works great for vegans or anyone wanting to eat less processed food. It fits your lifestyle easily.
This recipe shows that healthy baking can be just as tasty as the traditional kind. You get the best of both worlds: delicious banana bread and healthy ingredients.
Don’t be afraid to try new things with this recipe. Each batch is a chance to make something special. You’ll get better at baking and try new recipes.
Your kitchen will smell incredible, and your family will love it. You’ll feel great knowing you made something tasty and healthy. Happy baking!