(Hey! Some links in this post may be affiliate links — meaning I may earn a small commission if you buy through them, at no extra cost to you. As an Amazon Associate, I earn from qualifying purchases. I only share products I genuinely love and think you’ll find useful too. Read the full disclosure here).
Welcome to my kitchen, where we’re making the delicious and wholesome banana oat muffins you’ll love! I’m excited to share this recipe with you. These treats are a favorite in my home, and I think they’ll be in yours too!
These treats are special. They’re full of nutritious ingredients that make you feel good. The mix of ripe fruit and grains gives them a sweet, moist taste that’s hard to resist.
Looking for a quick breakfast or a healthy snack for the kids? These healthy muffins are perfect! They make the house smell amazing. Plus, making them is easier than you think!
Contents
- 1 Why These Healthy Banana Oat Muffins Beat Store-Bought Options
- 2 Gathering Your Ingredients for Success
- 3 Essential Equipment for Baking Perfect Muffins
- 4 Step 1: Preparing Your Workspace and Oven
- 5 Step 2: Making Your Banana Oat Muffins Batter
- 6 Step 3: Filling and Baking Your Muffins
- 7 Step 4: Testing for Doneness
- 8 Step 5: Cooling and Removing from Pans
- 9 Creative Variations and Flavor Combinations
- 10 Storage Solutions and Meal Prep Tips
- 11 Troubleshooting Common Issues
- 12 Nutritional Benefits and Health Information
- 13 Conclusion
Why These Healthy Banana Oat Muffins Beat Store-Bought Options
Making your own banana muffin recipe at home has big advantages. You choose quality ingredients over additives and preservatives. Homemade muffins taste fresher and healthier than store-bought ones.
Store-bought muffins are convenient but full of artificial stuff. Your homemade version lets you control what’s in it! You pick every ingredient for each bite.
Nutritional Advantages of Homemade Muffins
Homemade muffins are super nutritious. They have wholesome oats and bananas for natural sweetness and potassium. This combo is great for your heart.
Store-bought muffins have high fructose corn syrup and trans fats. Your recipe uses real ingredients like whole wheat flour and natural sweeteners. No need for artificial preservatives!
Store-bought muffins have 400-600 calories and up to 30 grams of sugar. Homemade versions are lower in calories and use natural sweeteners.
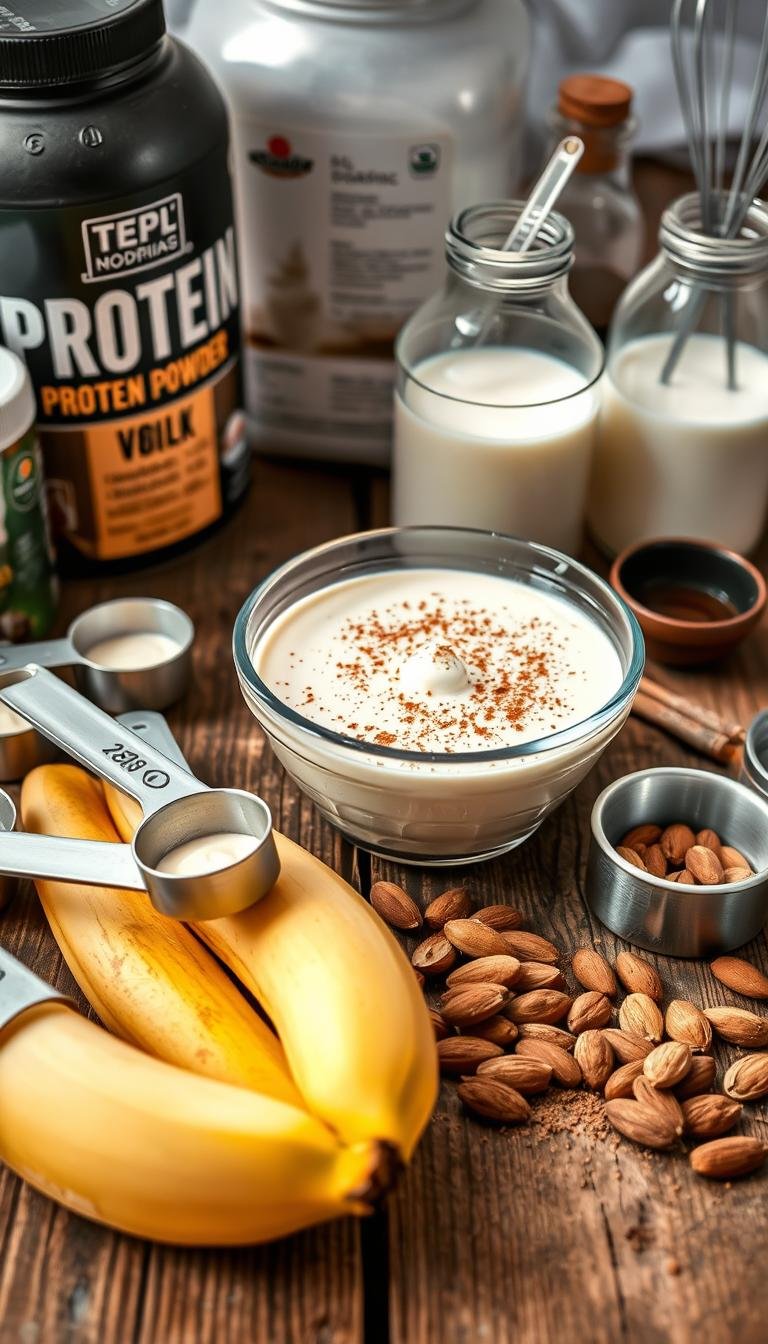
Adding protein powder, flax seeds, or Greek yogurt boosts nutrition. Try that with a packaged muffin!
Cost-Effective and Customizable
Healthy baking saves money. A dozen homemade muffins cost $3-4, while bakery muffins are $2-3 each. That’s a big difference!
Customization is endless! Want chocolate chips or gluten-free options? Easy! Prefer nuts for protein? Go for it!
Store-bought options lack flexibility. Your kitchen, your rules! You can adjust sweetness, add spices, or create unique flavors.
Freshness is a big plus for homemade muffins. They go from oven to table, unlike store-bought ones that sit for days.
Gathering Your Ingredients for Success
The secret to amazing banana oat muffins starts with choosing the right muffin ingredients! I’m here to guide you through every choice that makes your homemade treats incredible. Getting these basics right can turn okay muffins into ones everyone wants the recipe for.
Quality is key when making whole grain muffins from scratch. Each ingredient is important for the perfect texture and flavor. I’ll share my top tips for picking the best ingredients!

Selecting the Perfect Bananas
Those bananas with brown spots are actually perfect for baking! Look for bananas that are yellow with lots of brown speckles.
Ripe bananas are sweeter and mash easily. They add moisture and that rich banana flavor we all love. If your bananas aren’t ripe enough, place them in a paper bag for a day or two.
Avoid bananas that are green or too mushy. The best are soft but hold their shape when picked up.
Choosing the Right Type of Oats
Choosing the right oats is key for oat flour muffins. Old-fashioned rolled oats are better than instant oats. They keep their texture and add a hearty bite.
You can use rolled oats as is or pulse them in a food processor for oat flour. This makes the texture smoother while keeping whole grain benefits.
Steel-cut oats are too tough for muffins. Stick with rolled oats for that tender crumb in your whole grain muffins.
Healthy Ingredient Substitutions
Here’s where you can make your muffins healthier without losing flavor! Applesauce is great as a substitute for some oil, cutting calories and adding sweetness and moisture.
Greek yogurt is another good swap, adding protein and making muffins tender. You can replace up to half the oil with applesauce or Greek yogurt.
For sweeteners, use honey or pure maple syrup instead of refined sugar. They add flavor that regular sugar can’t match. Plant-based milk like almond, oat, or soy milk works well for dairy-free options.
Use whole wheat flour to replace some all-purpose flour for more fiber and nutrients. Start by substituting half the flour to see how you like it. This recipe is flexible and works with many healthy ingredients!
Essential Equipment for Baking Perfect Muffins
This easy muffin recipe is simple because you likely have everything needed in your kitchen. Homemade baking is easy when you stick to the basics. You don’t need fancy gadgets to make great muffins.
To make banana oat muffins, you need the right tools and know how to use them. Let’s go over what you need to make muffins that taste like they came from a bakery!
Required Baking Tools
Your muffin pans are key! A 12-cup muffin tin is perfect for this recipe. Non-stick pans are best because they make removing muffins easy and cleaning up is simple.
You’ll also need mixing bowls. One big bowl for mixing and another medium bowl for mashing bananas. If you only have one big bowl, you can manage.
Measuring accurately is important in baking. Use measuring cups for dry ingredients and spoons for small amounts like vanilla extract. Being precise ensures your muffins turn out the same every time!
A whisk or fork is all you need for mixing. You’ll also use a fork to mash bananas to the right consistency.
These basic tools are all you need for amazing muffins. Most people already have these, making this recipe easy to follow.
Optional Equipment for Better Results
Some extra tools can make baking better. An ice cream scoop or large spoon helps fill muffin pans neatly and evenly.
Paper liners make muffins easy to remove and clean up. They’re great for sharing or meal prep. Greasing your pan well works too, though.
A cooling rack is not necessary but helps. It keeps muffins from getting soggy by letting air circulate. This small investment improves texture a lot!
Using a food processor can help with oat flour or smooth banana puree. But, you can make this recipe without these tools. They’re just nice extras.
The secret to baking at home is using what you have and not getting too complicated. These baking tips are simple because the best muffins come from enjoying the process, not from expensive tools!
Step 1: Preparing Your Workspace and Oven
Getting your kitchen ready is key to making great breakfast muffins. It’s all about the prep work before you start mixing. A well-set workspace makes the whole process easier.
Missing a key ingredient mid-mix can be a real bummer. That’s why I’m sharing how to get your kitchen ready for quick breakfast success.
Setting Up Your Kitchen
First, clear your counter space completely. Think of it as your muffin command center! Get rid of anything not needed for baking to have room to work.
Next, put all your ingredients within reach. This includes bananas, oats, flour, eggs, and more. Having everything out prevents those “I forgot something” moments.
Have a damp towel ready for cleaning up. Your hands will get messy mashing bananas. Also, have a small bowl for eggshells and packaging.
Preheating and Preparing Muffin Pans
Now, let’s get the oven ready! Set it to 375°F (190°C) right away. This temperature is perfect for golden tops and moist muffins.
While the oven heats up, prepare your muffin pans. You can grease them with butter or cooking spray, or use paper liners. Nobody wants stuck muffins!
I prefer using paper liners for easy cleanup. They also give your muffins a professional look.
If greasing, use your fingers or a pastry brush. Make sure to cover the bottom edges well. This detail ensures your muffins come out perfectly every time!
Step 2: Making Your Banana Oat Muffins Batter
This step turns your ingredients into the base of moist banana muffins! Getting the batter right is key to avoiding dense muffins. It’s all about working carefully and not overmixing – it’s simpler than it seems!
Combining Dry Ingredients Properly
Begin with your dry ingredients for a solid start! In a large bowl, mix the flour, oats, baking powder, baking soda, and salt. Whisk for about 30 seconds to distribute evenly.
This ensures your muffin batter is well mixed. Avoiding uneven baking is important. Add spices like cinnamon or nutmeg now if using.
Mashing Bananas to the Right Consistency
Overripe bananas are your stars here! You want them mashed but not too smooth. This texture adds flavor and texture. Use a fork to mash them in a separate bowl.
Go for mostly mashed bananas with some chunks. This texture is better than banana bread. The chunks will soften and add banana flavor during baking.
Mixing Wet and Dry Ingredients
Now, it’s time for fun! In the bowl with mashed bananas, add eggs, milk, oil or melted butter, and sweetener. Whisk until just combined – don’t aim for perfection.
Then, mix the wet ingredients into the dry ingredients. My golden rule is to mix until the flour disappears. Use a spoon or spatula and fold gently. Seeing lumps is okay.
Avoiding Overmixing Mistakes
Overmixing is a common mistake that makes muffins tough. It overworks the flour’s gluten. This leads to chewy, dense muffins instead of tender ones.
Stop mixing when you can’t see dry flour anymore. A few lumps in your muffin batter are good. They’ll disappear during baking, leaving you with tender crumb.
Remember, treat your batter gently. Think of it like folding laundry, not stirring frosting. Your patience will reward you with light, fluffy muffins!
Step 3: Filling and Baking Your Muffins
Now, your batter turns into golden brown muffins! This step is where all your hard work pays off. How you fill your muffin cups and bake them makes a big difference.
Proper Batter Distribution Techniques
Filling your muffin cups evenly is an art. I fill each cup about two-thirds full. This lets your muffins rise without overflowing.
An ice cream scoop makes this job easy. It ensures consistent portions every time. If you don’t have one, a large spoon works too. Try to make each portion similar for even baking.
Don’t worry if they’re not perfect. That’s what makes them special! The goal is consistency, not perfection.
Optimal Baking Time and Temperature
Set your baking temperature to 375°F for fluffy muffins. Place the filled cups in your preheated oven and set the timer for 18 to 22 minutes.
The exact time depends on your oven and muffin size. Standard muffins take about 20 minutes. Mini ones bake faster, and jumbo ones take longer.
At 10 minutes, your kitchen will start smelling amazing. The banana and oat aroma is incredible.
Monitoring During the Baking Process
Don’t open the oven door too early. Temperature changes can affect your muffins. Check them around the 15-minute mark.
Look for muffins that are starting to turn golden brown on top. They should be pulling away from the sides and have firm, set tops.
Your golden brown muffins are done when they spring back lightly. They should be evenly colored and smell amazing.
Trust your nose too! When they smell incredible and look golden, they’re probably done. This gets easier with practice.
Step 4: Testing for Doneness
Now it’s time to see if your muffins are done! This is the moment you find out if you’ve made perfectly baked muffins. I’ll show you easy ways to check, so you can be sure every time.
The Toothpick Test Method
The doneness test with a toothpick is my top choice. It’s simple and always works:
- Insert a clean toothpick or thin knife into the center of a middle muffin
- Push it down about three-quarters of the way through
- Pull it out slowly and examine what’s on it
- Look for just a few moist crumbs clinging to the toothpick
Don’t see wet batter, but don’t expect it to be clean either! A few crumbs mean your muffins are just right. If it’s wet, bake for 2-3 more minutes and check again.
Visual and Texture Indicators
Your eyes and senses can tell you a lot about muffin texture. Here’s what to look for:
Color and appearance: Your muffins should look golden-brown on top and firm. The edges will start to pull away from the cup.
Touch test: Press the center of a muffin with your finger. It should feel firm, not squishy.
Sound clues: Listen for a soft sizzling sound. It means the moisture is evaporating well.
Every oven is different, so trust your gut. If they need more time, that’s okay. It’s better to bake them a bit longer than to have them underdone. You’re doing great!
Step 5: Cooling and Removing from Pans
When you take those golden muffins out of the oven, patience is key! The smell is so tempting, but proper cooling techniques are essential for the best texture. This step turns your baked goods into something truly special!
Proper Cooling Techniques
Let your muffins cool in the pan for 5 minutes after baking. This helps the inside set and prevents crumbling. The heat keeps working its magic during this time.
Once the 5 minutes are up, move your muffins to a wire rack. This step prevents the bottoms from getting soggy. Never skip this step – it’s vital for the perfect texture!

Let them cool on the rack for another 10-15 minutes before serving. It’s hard to resist a warm muffin, but cooling fully enhances the flavors.
Safe Removal Methods
If you used paper liners, removing the muffins is easy. Just lift them by the liner edges. The paper prevents sticking.
For greased pans without liners, use a thin knife to loosen the edges. This method avoids damaging your muffins. Be gentle and patient – rushing can break them.
Don’t worry if some muffins stick a bit. A gentle twist usually helps. The most important thing is to stay calm and move slowly.
If you’re storing your muffins, make sure they’re completely cool first. Warm muffins can make them soggy. Cooling them takes about 30 minutes, but it’s worth the wait for perfectly preserved treats!
Creative Variations and Flavor Combinations
Your basic banana oat muffin recipe is just the start. Let’s make each batch uniquely yours! This customizable recipe is perfect for endless delicious experiments. Simple additions can turn your muffins into exciting new treats.
I see these muffins as edible canvases waiting for your creative touches. Whether you want something indulgent, fruity, or seasonally spiced, there’s a variation for you. The key is knowing which ingredients work best and how much to add without ruining the muffin’s structure.
Here’s my go-to guide for creating amazing muffin variations that never fail to impress:
| Mix-In Category | Recommended Amount | Best Options | Pro Tips |
|---|---|---|---|
| Chocolate & Nuts | 1/2 to 3/4 cup | Mini chocolate chips, chopped walnuts, pecans | Toss in flour before folding to prevent sinking |
| Fresh & Dried Fruits | 1/2 to 2/3 cup | Blueberries, diced strawberries, dried cranberries | Don’t thaw frozen berries; coat in flour first |
| Spices & Extracts | 1/2 to 1 teaspoon | Cinnamon, nutmeg, vanilla extract, cardamom | Start with less – you can always add more next time |
| Seasonal Additions | 1/2 to 3/4 cup | Pumpkin pie spice, coconut flakes, cinnamon chips | Combine 2-3 complementary flavors for depth |
Chocolate Chip and Nut Additions
Nothing beats banana and chocolate together! I love adding mini chocolate chips for even chocolate in every bite. Dark chocolate is great, but milk chocolate is perfect for kids.
Walnuts are traditional and pair well with banana’s sweetness. Pecans add a buttery richness. Toasted almonds bring a delightful crunch, while coconut flakes add a tropical twist.
My secret? Toast your nuts in a dry pan for 2-3 minutes before adding them. This intensifies their flavor and creates an amazing aroma that’ll have everyone asking what makes your muffins so special!
Berry and Fruit Combinations
Fresh berries turn these muffins into bursts of summer goodness! Blueberries are my favorite – they’re like little jewels that pop with sweetness. Diced strawberries add beautiful color and a lovely tartness that balances the banana perfectly.
Don’t overlook dried fruits either! Cranberries bring a festive touch, while chopped dried apricots add sophisticated sweetness. For something truly special, try diced fresh pineapple with a sprinkle of coconut – it’s like vacation in muffin form!
Here’s a key tip: when using frozen berries, never thaw them first. Toss them in a tablespoon of flour before folding into your batter. This prevents the berries from bleeding and turning your muffins an unappetizing color.
The secret to perfect berry muffins is gentle folding – treat those berries like precious gems and they’ll reward you with beautiful, evenly distributed bursts of flavor!
Spice Blends and Seasonal Flavors
This is where flavor combinations get really exciting! Warm spices like cinnamon and nutmeg are natural partners with banana. I love adding a teaspoon of cinnamon for that cozy, bakery-fresh aroma that fills your entire kitchen.
For fall baking, pumpkin pie spice is magical – it contains cinnamon, nutmeg, ginger, and allspice all in one convenient blend. During the holidays, I create festive versions with vanilla extract and mini cinnamon chips that taste like celebration in every bite!
Cardamom adds an exotic, slightly floral note that’s surprisingly sophisticated. Start with just a pinch – this spice is potent but transforms ordinary muffins into something restaurant-worthy. For summer, try adding lemon zest and a touch of vanilla for bright, sunny flavors.
Remember, the goal is enhancement, not overpowering the lovely banana flavor. Start with smaller amounts and taste-test your batter (yes, it’s safe with these ingredients!). You can always add more spice to your next batch, but you can’t take it out once it’s mixed in.
Storage Solutions and Meal Prep Tips
Smart storage techniques will help you enjoy these nutritious treats long after they come out of the oven! Whether you’re planning ahead for busy mornings or simply want to savor your homemade goodness throughout the week, proper storage makes all the difference. Let me share my favorite methods for keeping these delicious muffins at their absolute best.
Short-Term Storage Methods
For storing muffins you’ll enjoy within the next few days, room temperature storage works perfectly! The most important rule is to let your muffins cool completely before storing them. Any residual warmth creates condensation that can make them soggy – and nobody wants that!
Here are my go-to short-term storage options:
- Airtight containers: A plastic container with a tight-fitting lid keeps muffins fresh for 3-4 days
- Large zip-top bags: Perfect for storing multiple muffins while maintaining freshness
- Refrigerator storage: Extends freshness up to one week when properly sealed
I always place a paper towel in the bottom of my storage container. It absorbs any excess moisture and helps maintain that perfect texture we all love!

Freezing for Long-Term Storage
Freezing is absolutely fantastic for meal prep enthusiasts! These banana oat muffins freeze beautifully for up to three months without losing their delicious flavor or texture.
My foolproof freezing method involves these simple steps:
- Wrap each cooled muffin individually in plastic wrap
- Place wrapped muffins in a labeled freezer bag
- Remove as much air as possible before sealing
- Write the date on the bag for easy tracking
This individual wrapping prevents freezer burn and makes it super convenient to grab just one or two muffins at a time. Perfect for those rushed morning routines!
Reheating Techniques
Bringing your fresh muffins back to life is easier than you might think! The key is choosing the right reheating method for your situation.
For frozen muffins: Let them thaw at room temperature for about an hour, or microwave for 30-60 seconds if you’re in a hurry. The microwave method works great when you need that warm, comforting treat right away!
For day-old muffins: A quick 10-15 second microwave zap brings back that just-baked warmth and softness. It’s like magic!
For a special treat: Try warming them in a 300°F oven for 5-10 minutes. This method crisps up the outside slightly while keeping the inside perfectly moist – absolutely divine!
The secret to successful meal prep is having delicious, nutritious options ready when you need them most.
With these storage and reheating techniques, you’ll always have a healthy snack or breakfast option ready to go. Your future self will thank you for this thoughtful preparation!
Troubleshooting Common Issues
Don’t worry if your banana oat muffins didn’t turn out perfect the first time. We can fix that together! Even experienced bakers face challenges. Effective baking troubleshooting is a skill that develops over time. Let me walk you through the most common issues and their simple solutions.
Most muffin problems come from a few key factors. Temperature, mixing technique, and ingredient freshness are huge. The good news? These issues are totally fixable once you know what to look for!
Dense or Heavy Results
Dense, heavy muffins often come from overmixing your batter. Overmixing develops the gluten in the flour. This makes your muffins tough and chewy instead of light and fluffy.
Mix your ingredients just until the flour disappears. A few lumps are perfectly fine! Stop mixing when you can see tiny pockets of flour. Your batter should look slightly rough, not smooth.
Another culprit could be expired leavening agents. Baking powder and baking soda lose their power over time. Check those expiration dates! If your leavening agents are old, they won’t create the lift needed for fluffy muffins.
Dry or Crumbly Issues
Achieving perfect texture means getting the moisture balance just right. Dry, crumbly muffins usually need more liquid in the batter. Make sure your bananas are nice and ripe – those brown spots are your friend!
If your batter seems too thick, don’t hesitate to add an extra tablespoon of milk or oil. The batter should pour easily but not be runny. Trust your instincts – if it looks too thick, it probably is.
Overbaking is another common cause of dryness. Start checking your muffins a few minutes before the recommended time. They’re done when a toothpick comes out with just a few moist crumbs.
Remember, every oven is different, so don’t be discouraged if you need to adjust the time or temperature slightly to get perfect results in your kitchen!
Uneven Baking Solutions
Uneven baking often points to oven hot spots or improper pan placement. Most ovens have areas that run hotter than others. Try rotating your muffin pan halfway through baking for more even results.
Make sure you’re not overcrowding your oven. Good air circulation is essential for even baking. If some muffins are browning too quickly, tent them with aluminum foil to slow down the browning process.
Altitude can also affect your baking troubleshooting efforts. If you’re at high altitude, reduce leavening agents slightly and increase liquid ingredients. These small adjustments can make a huge difference in achieving that perfect texture you’re after!
Nutritional Benefits and Health Information
When you take a bite of these banana oat muffins, you’re getting more than just flavor. They’re filled with healthy ingredients that are good for your body. Every muffin is packed with nutrients and satisfies your sweet tooth naturally.
Oats, bananas, and whole grains make these muffins a nutritional powerhouse. Oats are full of fiber, keeping you full for hours. They also have beta-glucan, which is good for your heart.
Bananas add natural sweetness and potassium for muscle function. They also have vitamin B6 for energy. You get all this nutritional value without processed sugars or artificial additives.
Calorie and Nutrient Breakdown
Each muffin has about 180-220 calories. They’re a good choice for breakfast or a snack. The exact calories depend on your ingredients and add-ins.
Here’s what you get in each muffin:
- Fiber: 3-4 grams from oats and whole wheat flour
- Protein: 4-5 grams for muscle health
- Potassium: 200-250mg from bananas
- Vitamin B6: Good for brain function and energy
- Complex carbohydrates: For sustained energy
The natural sugars from bananas give quick energy. The fiber slows down sugar absorption for steady blood sugar. These muffins are great for active people!
Dietary Considerations and Modifications
These muffins can fit almost any diet with simple dietary modifications. You can customize them easily and deliciously.
They’re perfect for vegetarian diets as is. For vegan diets, just use plant-based milk and flax eggs or applesauce instead of eggs.
Gluten-free bakers can use their favorite gluten-free flour blend. Oat flour is a great choice for its hearty texture.
For less sugar, use ripe bananas’ natural sweetness. Try stevia or monk fruit sweetener for even less sugar.
These muffins work well for different diets:
- Keto-friendly: Use almond flour and sugar substitutes
- Paleo version: Almond flour with natural sweeteners like honey
- Dairy-free: Plant-based milk and oil instead of butter
- Lower calorie: Reduce oil and use unsweetened applesauce
The healthy ingredients make these modifications easy. You can create treats that fit your lifestyle perfectly!
Conclusion
You’ve learned how to make amazing homemade banana muffins! This easy recipe turns simple ingredients into a special treat for your family.
This recipe is easy to make. You can make a batch on busy Sunday afternoons. Enjoy fresh muffins all week. Your kitchen will smell amazing, and you’ll be proud of what you’re eating.
Healthy baking takes practice and patience. Don’t worry if your first batch isn’t perfect. Each try teaches you something new. The ripe bananas, wholesome oats, and natural sweeteners make these muffins a guilt-free treat.
These muffins freeze well, making meal prep easy. Just microwave one for 20 seconds for a warm breakfast. Your family will love having healthy options when mornings are busy.
Start getting your ingredients today! Once you try these fluffy, banana-packed muffins, you’ll see why homemade is better. This recipe is perfect for busy homes because it’s convenient, nutritious, and delicious.
Happy baking! Your kitchen adventure with these delightful muffins is about to start.